

Set Up PROTECT Server
This guide provides step-by-step instructions on configuring the GuardWare PROTECT Server on a Windows Server. It includes installing required dependencies like Microsoft Visual C++ Redistributable, MySQL, and Redis, installing the GuardWare PROTECT Server and the IIS Rewrite Module, and setting up the Azure Key Vault. Once all steps are completed, you’ll be able to access the GuardWare Management Console.
1. Prerequisites
Before proceeding, make sure the following requirements are met. Meeting these prerequisites helps avoid installation errors and ensures GuardWare PROTECT Server functions properly.
Specifications
Minimum Requirements
CPU
intel i5, 8-core processor
RAM
16 GB
Storage
500 GB free disk space
Windows Server Version
2019 or later with all the latest updates installed
Administrator Access
Required for software installation and server configuration
Firewall
Open ports: 443 (HTTPS), 3306 (MySQL), 6379 -Default (TCP), 8000 (API Port)
Database User Privileges
CREATE, SELECT, INSERT, UPDATE, DELETE on the database
Mobile Device
Mobile device with Google/Microsoft Authenticator app installed
2. Pre-Installation Requirements
Before installing the GuardWare PROTECT Server, ensure the following dependencies are installed on your Windows Server in the order listed below. These components are necessary to support the core server functions and backend operations of PROTECT.
GuardWare will provide all required installer files for these components as part of the PROTECT Server installation package. You can also download the installer files from their official websites.
Microsoft Visual C++ Redistributable: Required to run applications built with Visual C++ libraries, including runtime components used by MySQL and its associated services.
MySQL: Serves as the database backend for PROTECT. It stores configuration details, encryption metadata, user profiles, and other operational data.
Redis: Used as an in-memory cache and message broker to support real-time processing and improve system performance.
2.1. Install Microsoft Visual C++ Redistributable
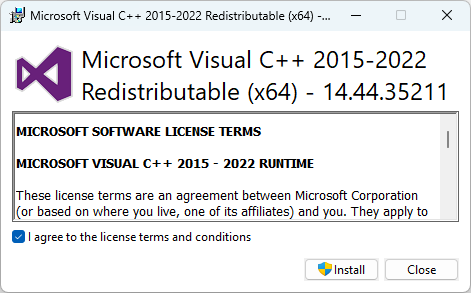
Download the installer file for Microsoft Visual C++ 2015-2022 Redistributable.
Double-click the Microsoft Visual C++ Redistributable installer file to begin the installation.
Read and agree to the license terms and conditions and click Install.
2.2. Install and Configure MySQL
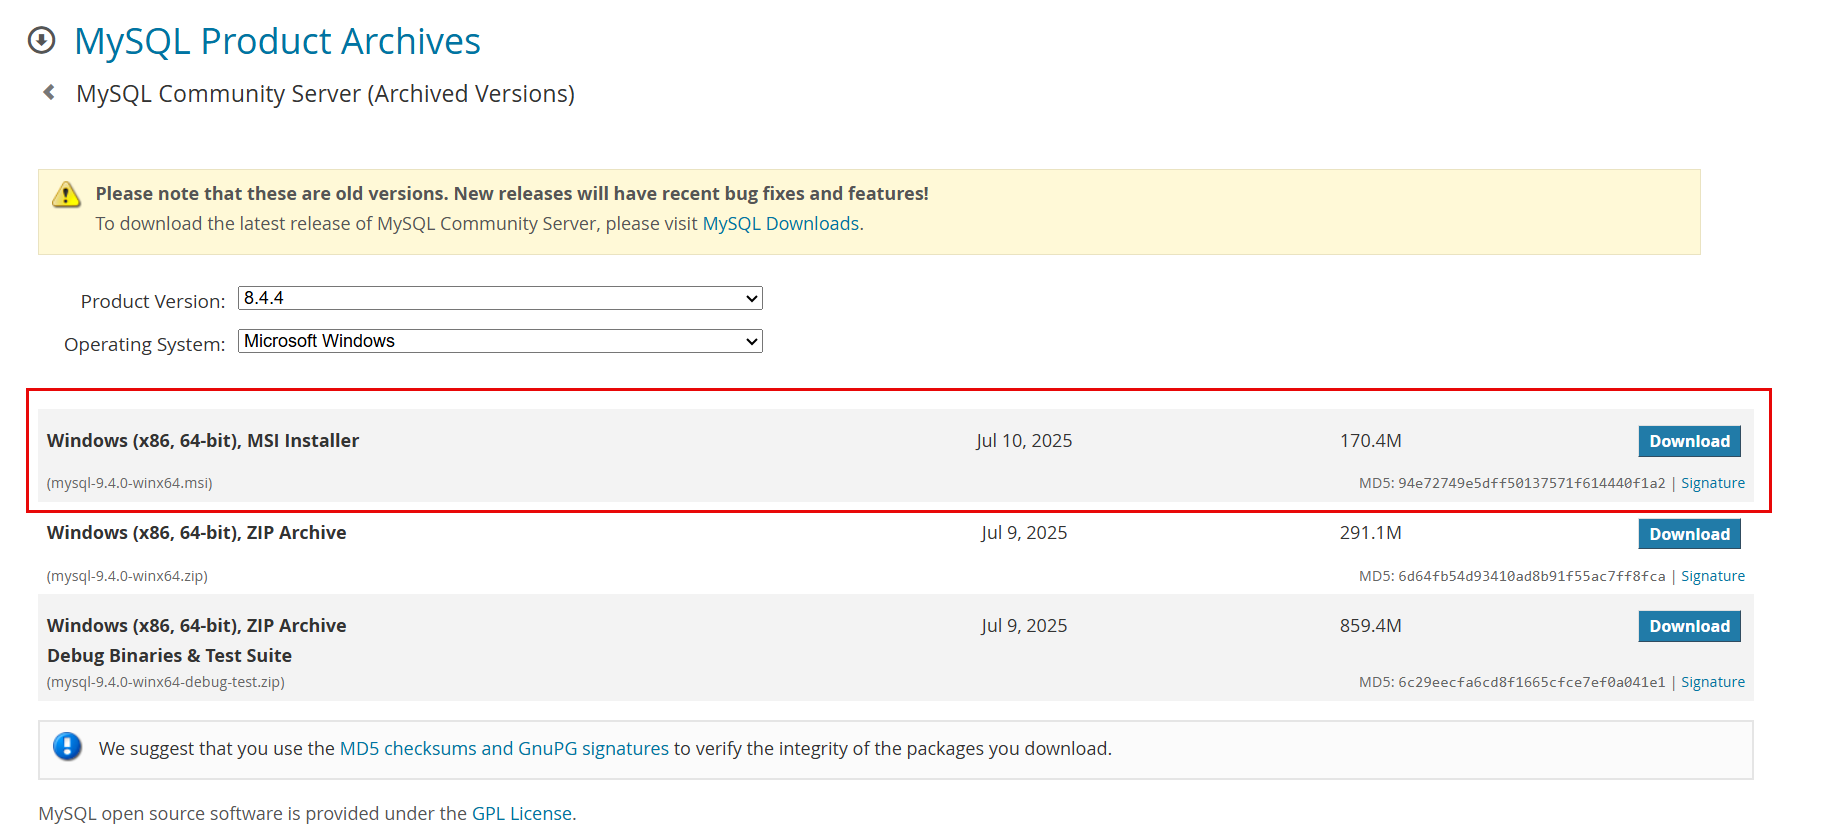
Download the installer file for MySQL (v8.4.4).
PROTECT_MySQL_download.png Double-click the MySQL installer file to begin the installation and click Next.
Read and accept the End User Licence Agreement (EULA) and click Next.
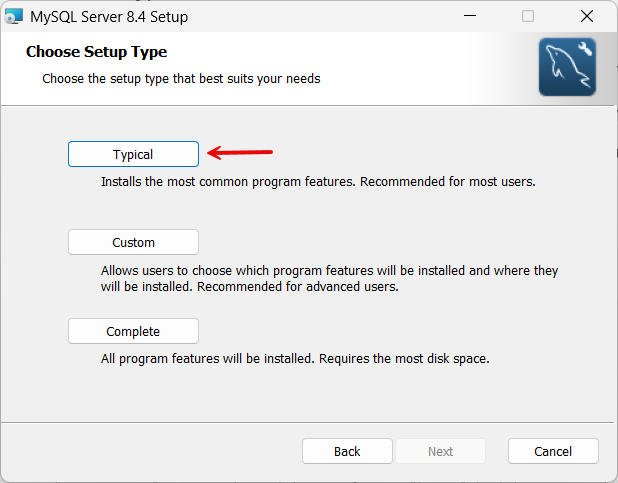
When selecting the setup type, you have the option to choose the following:
Typical: Installs the server, client, and essential tools quickly. Provides everything PROTECT needs without extra components.
Complete: Includes all optional components, sample databases, and documentation.
Custom: Lets you select only required components (server + client). Useful if you want to reduce disk usage, omit unnecessary tools, or deploy on a constrained system.
Select Typical and click Next.
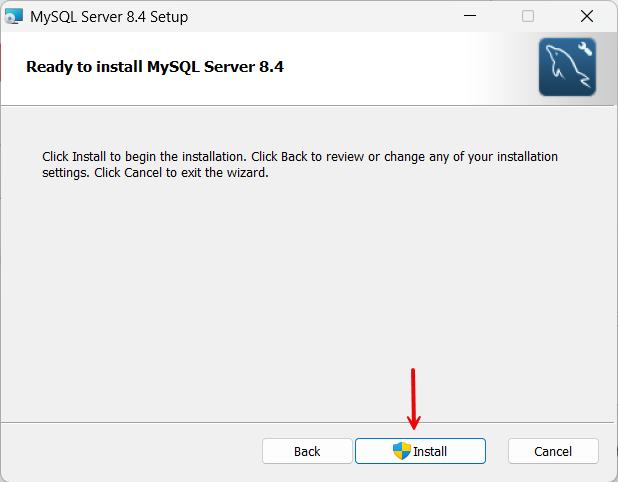
MySQL typical.png Click Install to begin the installation.
MySQL install.png Select Run MySQL Configurator to automatically launch the MySQL Configurator after clicking Finish.
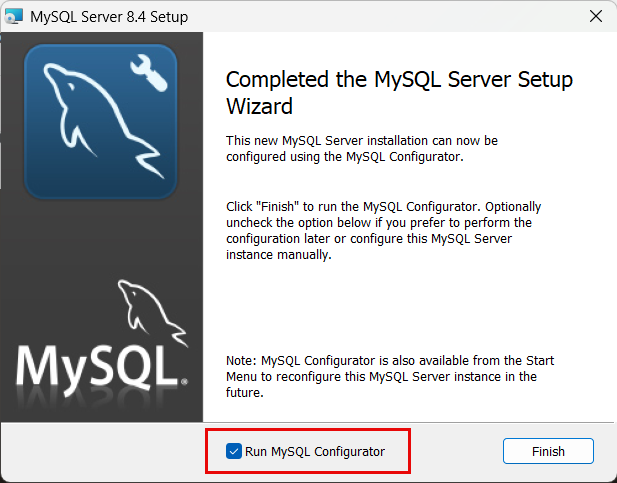
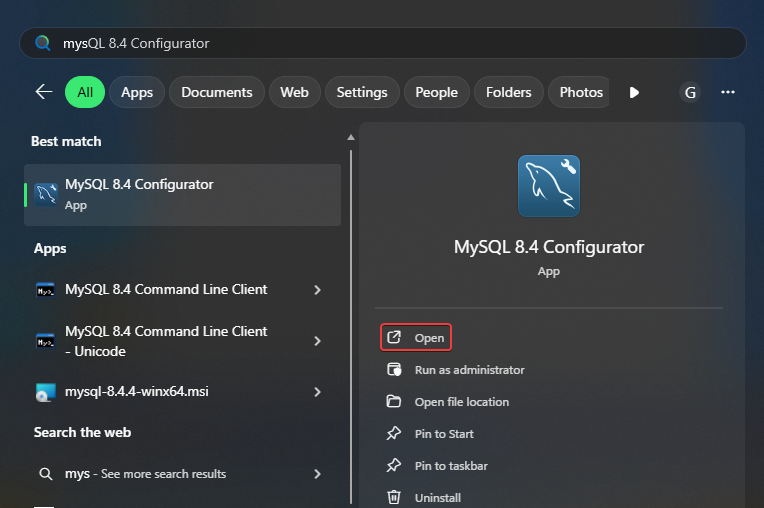
PROTECT_Run MySQL Configurator.png If you did not select Run MySQL Configurator on MySQL Server Setup, search for MySQL Configurator on your PC and click Open to launch it.
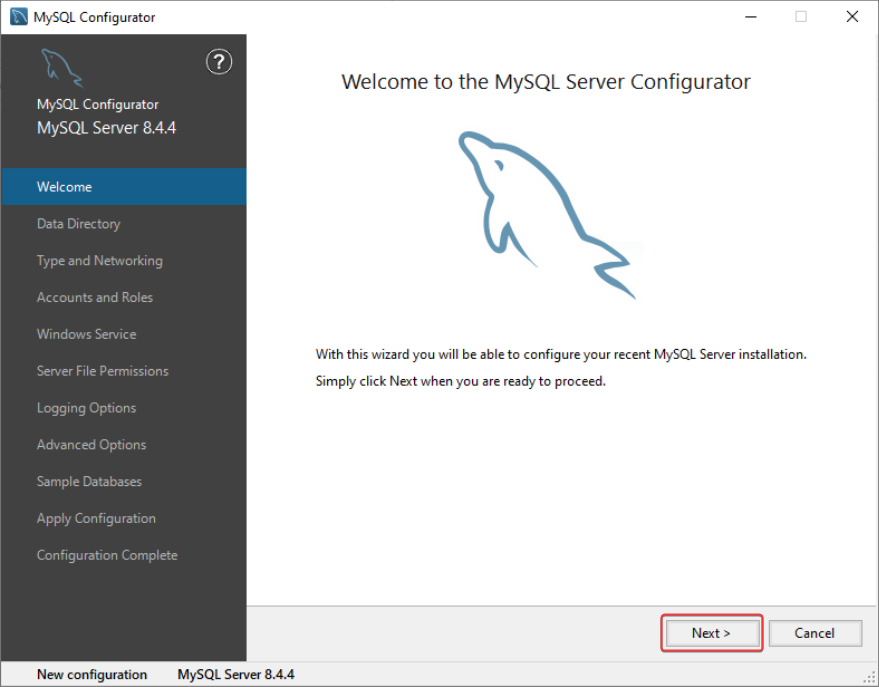
Click Next on the Welcome screen.
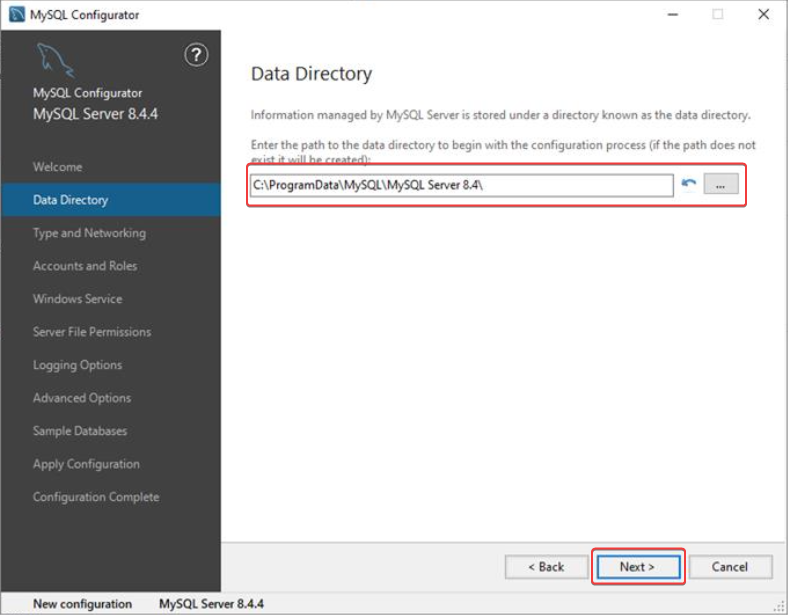
Select a path to the data directory. By default, it will be installed in:
C:\ProgramData\. Click Next.
In the Type and Networking window, select Server Computer as Config Type and note down the assigned Port number. Click Next.
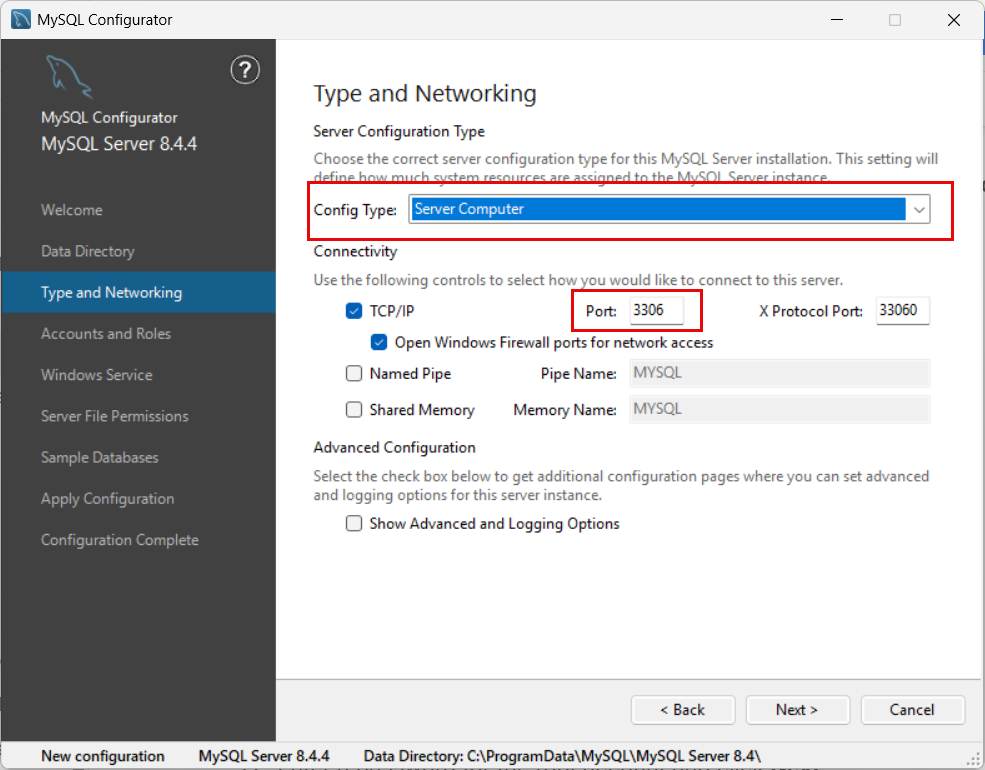
MySQL config type.png Enter a password for the root account and click Next.
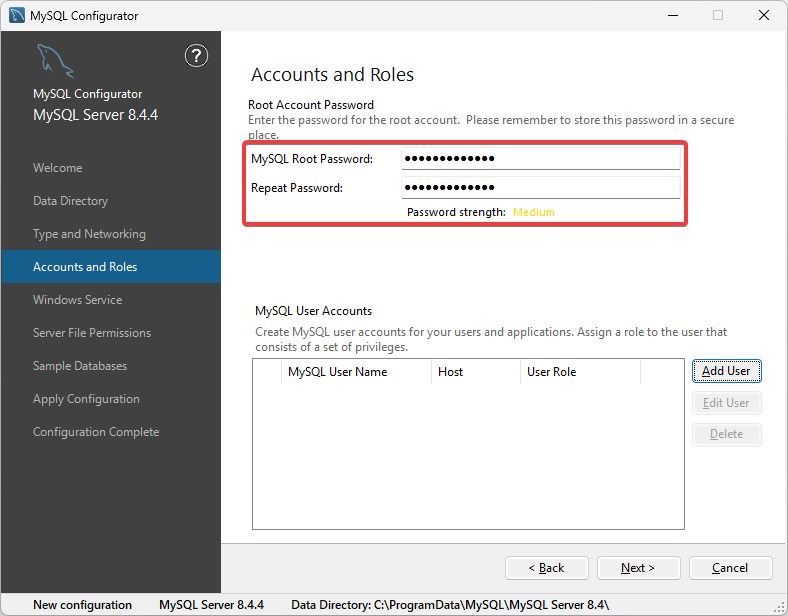
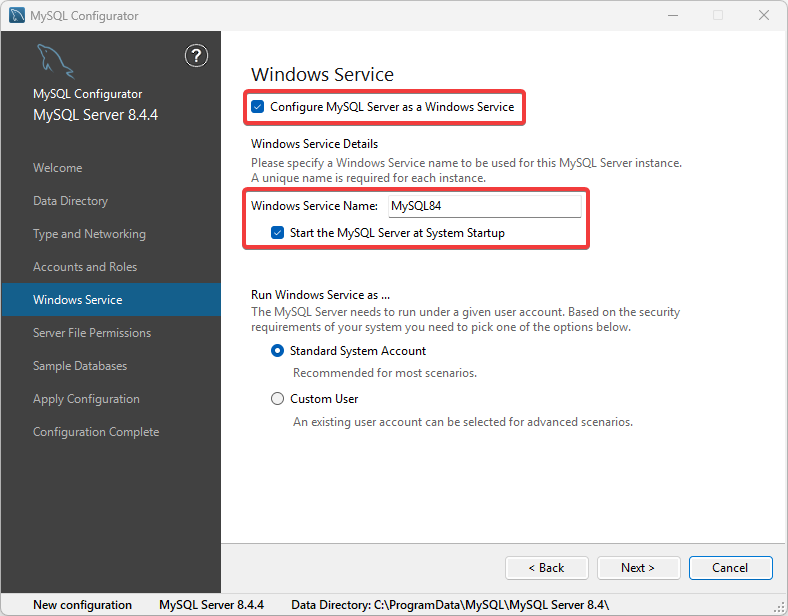
In Windows Service, enable Configure MySQL Server as a Windows Service and Start the MySQL Server at System Startup.
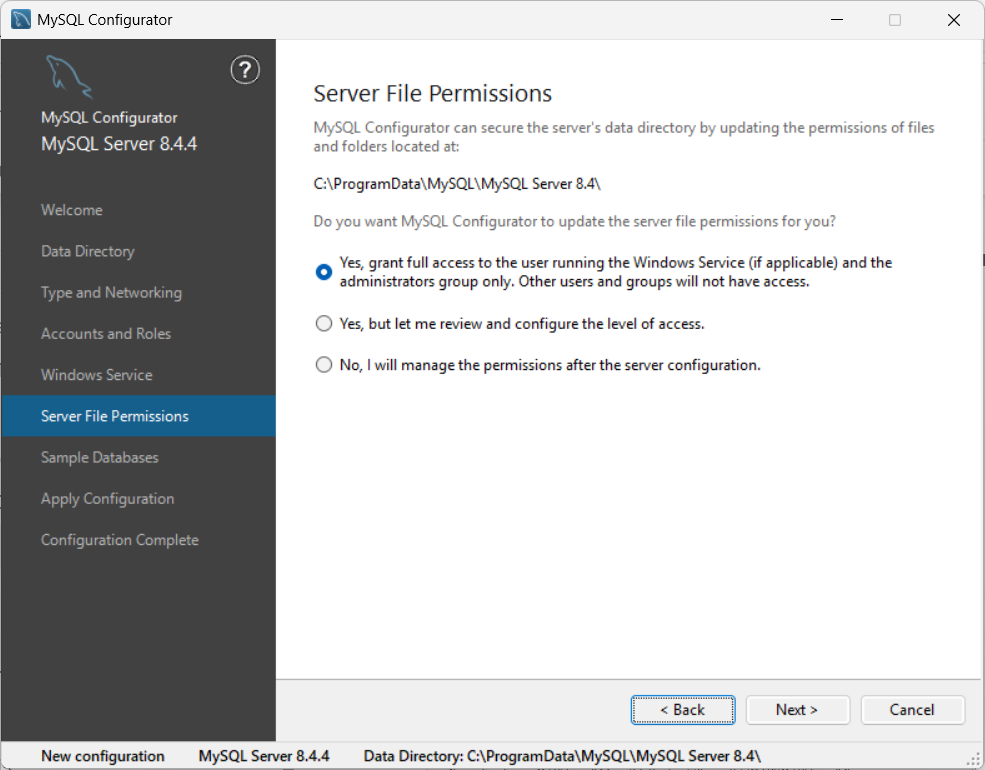
In Server File Permissions, select file permission as required for your environment, and click Next.
Skip sample database creation (not necessary for PROTECT).
Review the configuration summary and click Execute.
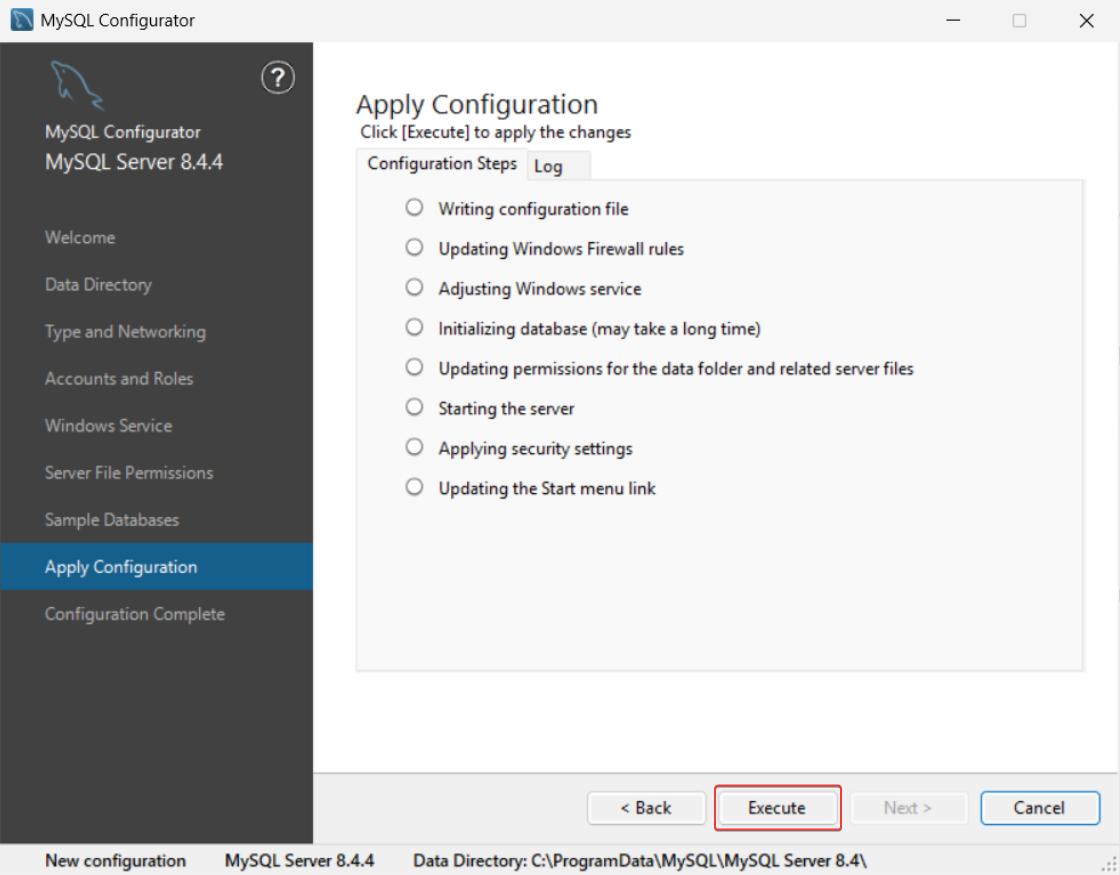
image-20251017-050414.png After the configuration is completed, click Next and click Finish.
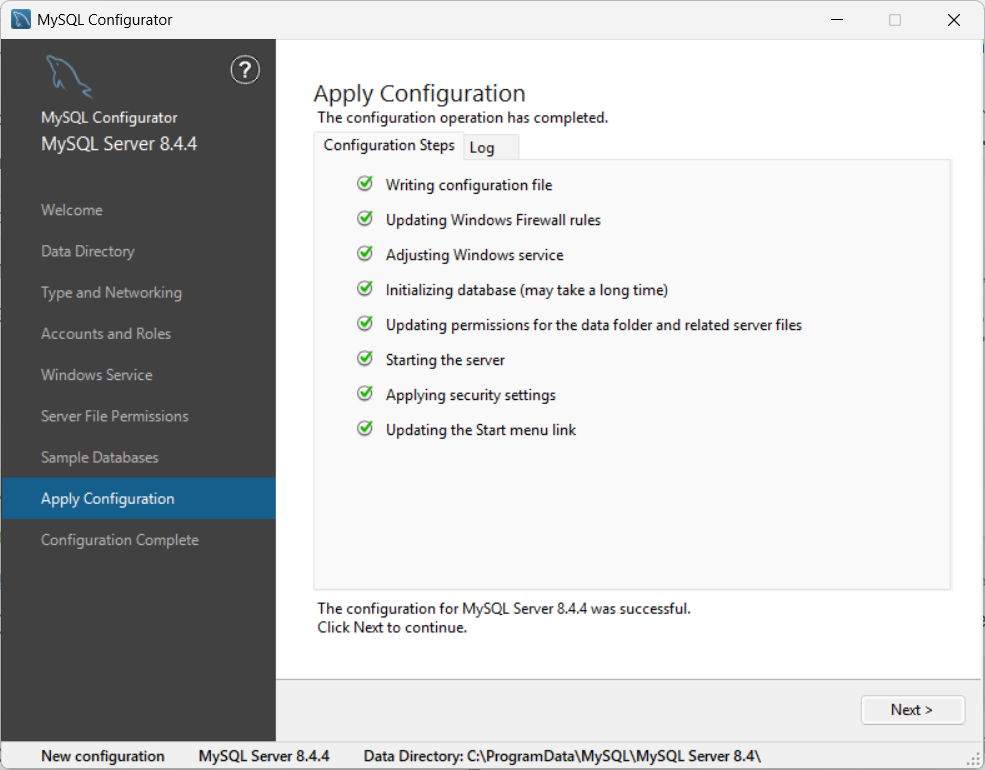
MySQL configuration complete.png
2.3. Install Redis
Download the MSI installer file for Redis.
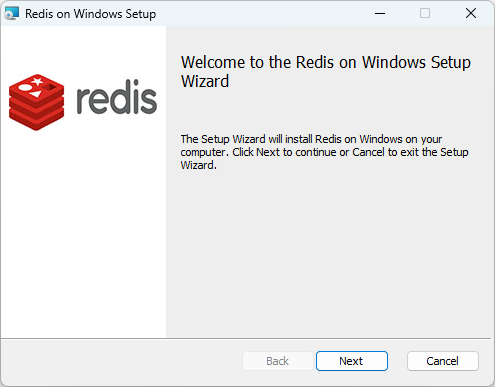
Double-click the Redis installer file to begin the installation, and click Next.
Read and accept the EULA and click Next.
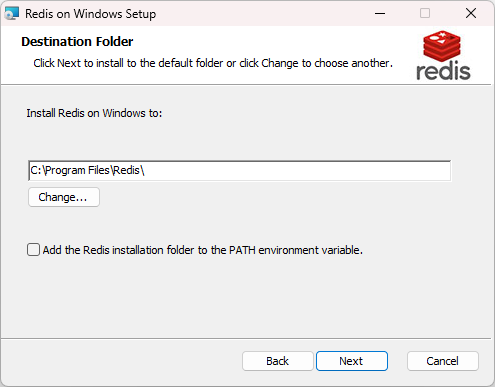
Select the installation directory for Redis and click Next.
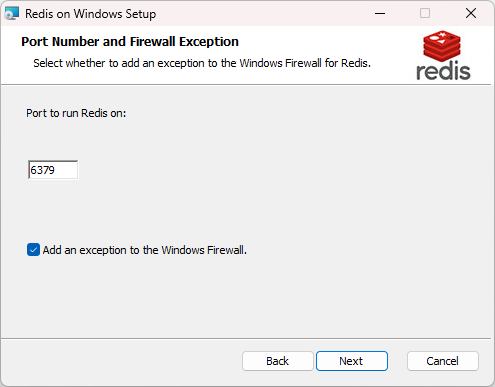
Enter the desired port number or leave the default value. Select Add an exception to the Windows Firewall to create a firewall rule in Windows Defender Firewall that allows inbound network traffic to the Redis server’s default port. Click Next.
Set the max memory limit to 1024 MB and click Next.

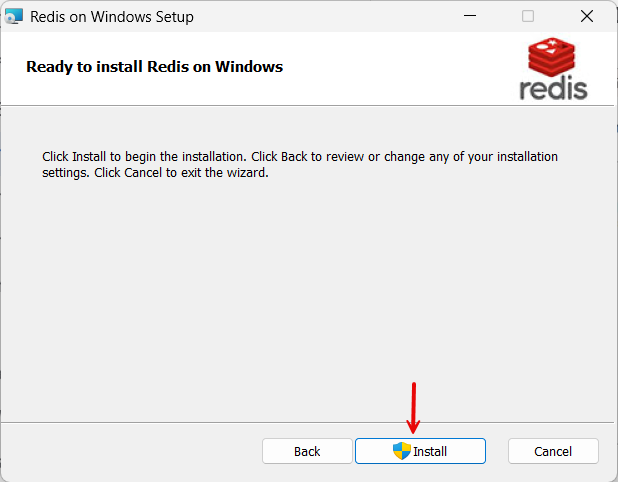
Redid MAx memory.png Click Install to begin the installation.
Redis Install button.png
3. Set up Azure Key Vault
GuardWare PROTECT uses Azure Key Vault to store the encryption keys securely. Azure Key Vault is a cloud service that provides centralised, secure storage for secrets such as encryption keys, passwords, certificates, and connection strings. By integrating with Azure Key Vault, GuardWare PROTECT ensures that encryption keys are never exposed within the application environment and remain under strict access control.
To set up Azure Key Vault, you need to do the following in the Azure Portal:
Ensure that you sign in to the Azure Portal with an account that has the necessary admin permissions (such as Global Administrator or Key Vault Administrator) before proceeding.
During this process, make sure to note down and securely store the following details, as they will be required later while setting up the PROTECT server:
Azure Tenant ID
Azure Client ID
Azure Client Secret
Azure Subscription ID
Azure Key Vault Name
Resource group
3.1. Register an Application (Service Principal)
A Service Principal provides an identity for GuardWare PROTECT Server to authenticate with Azure services. It acts as a secure, application-level account that allows GuardWare PROTECT Server to access the Azure Key Vault without requiring a user’s credentials.
Go to the Azure Portal and sign in with your Azure Administrator account.
Navigate to Microsoft Entra ID.

Click +Add, and select App registration.

Configure:
Name: Enter a user-facing descriptive display name (e.g.,
GWProtectApp).Supported account types: Select Accounts in this organizational directory only (Single tenant).
Redirect URI: Leave empty for service-to-service authentication.
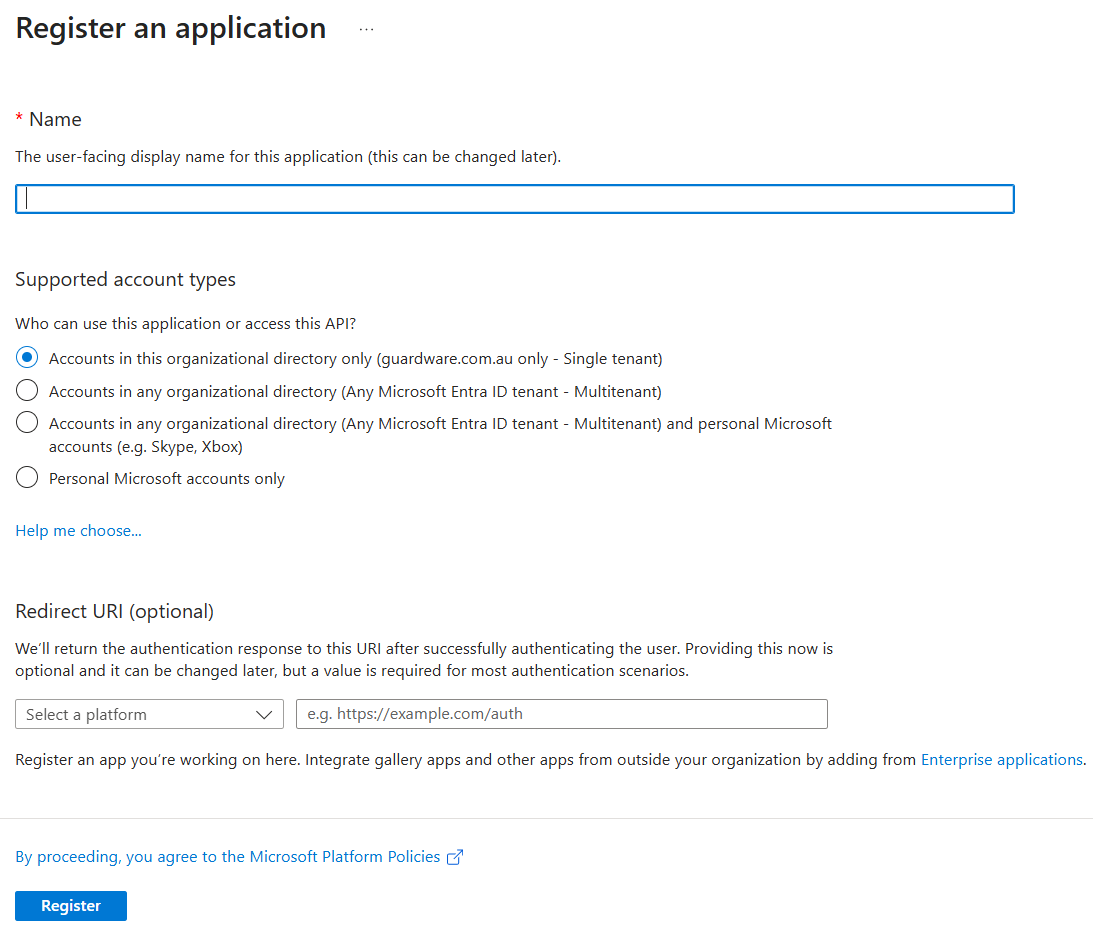
Click Register.
After registration is complete, you will get the Application (client) ID and Directory (tenant) ID in the Overview page. Copy and store them in a secure place. These are the AZURE CLIENT ID and AZURE TENANT ID that you’ll need to set up PROTECT Server.
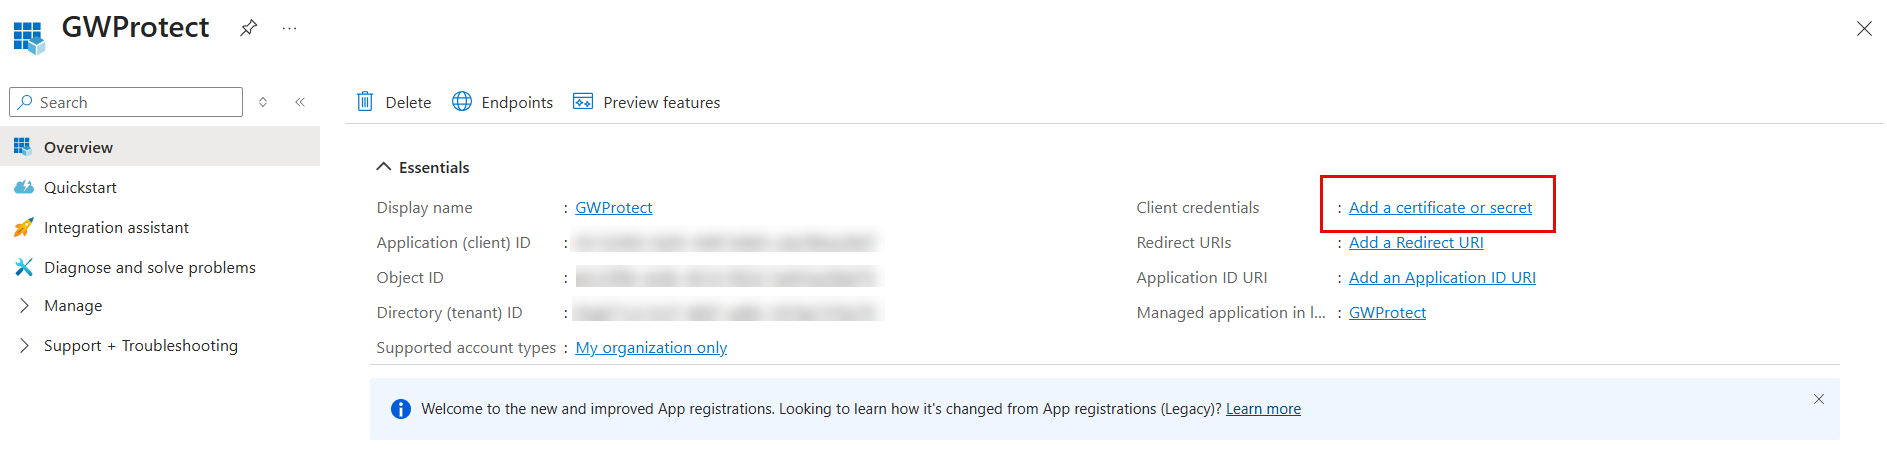
3.1.1. Create Client Secret
A Client Secret acts like a password for the Service Principal and is used by GuardWare PROTECT to authenticate securely with Azure Active Directory. The Client Secret is required during initial configuration to establish a trusted connection with Azure Key Vault and enable GuardWare PROTECT to retrieve encryption keys when needed.
In the Overview page, click Add a certificate or secret.
Click + New client secret.
Configure:
Description: Enter a description for the Client Secret.
Expires: Select an expiration date for the Client Secret.
Click Add. Copy and securely store the Client Secret Value (not the Secret ID). It will no longer be visible after you close the window. This is the AZURE CLIENT SECRET that you’ll need to set up the PROTECT Server.
3.1.2. Required API Permissions
GuardWare PROTECT needs specific Microsoft Graph API permissions to authenticate with Azure AD, securely access encryption keys stored in Azure Key Vault, and integrate with Microsoft Information Protection (MIP) for file labelling and encryption.
Navigate to API Permissions and click Add a permission.
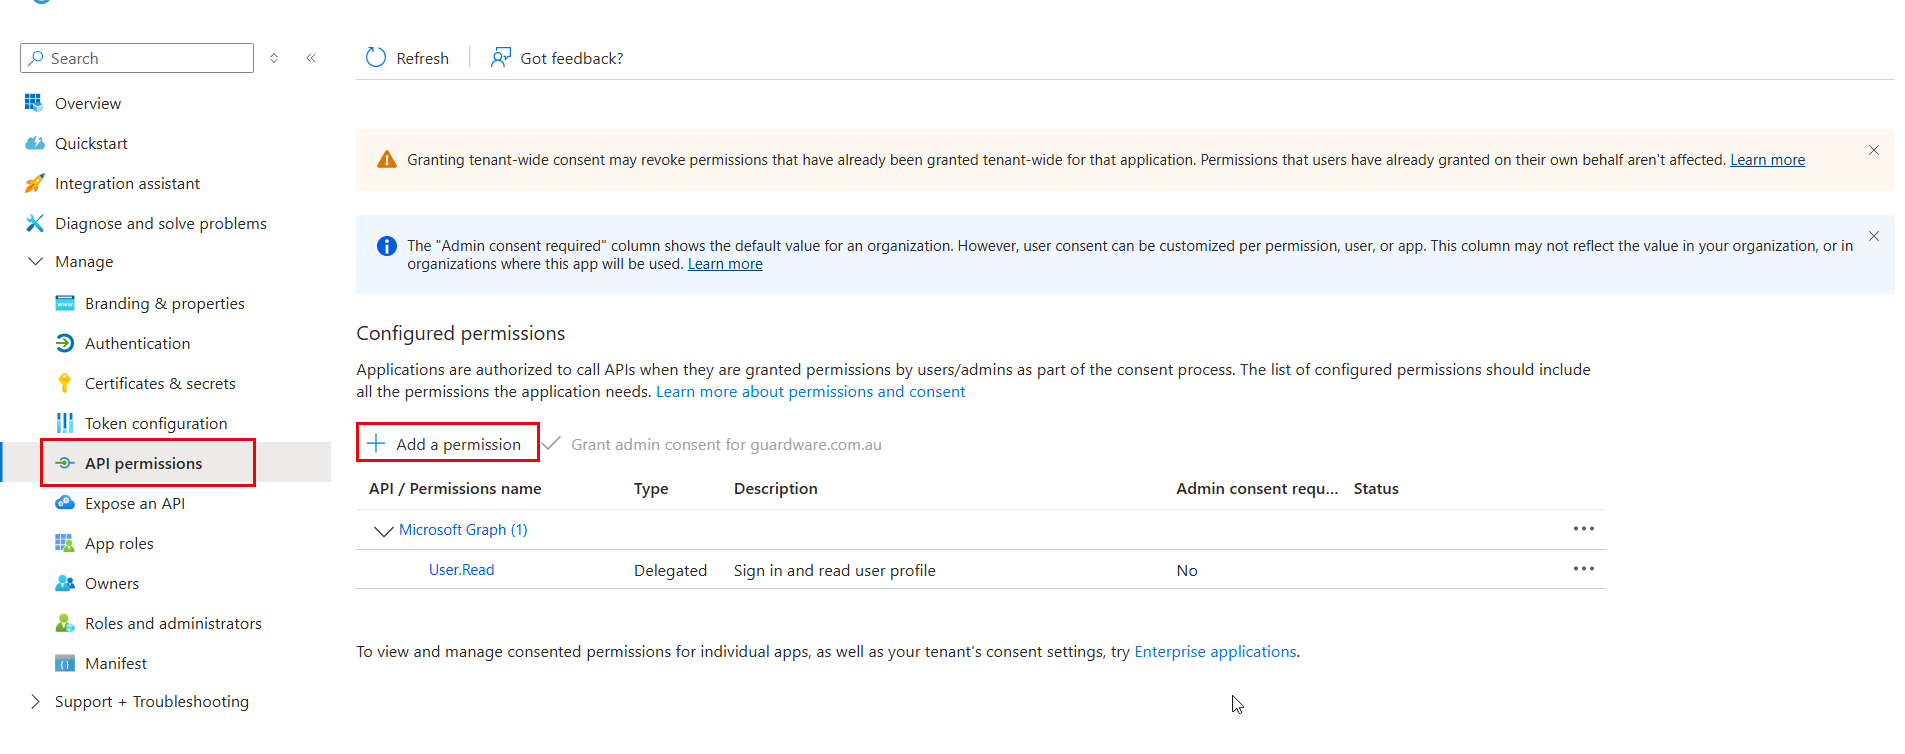
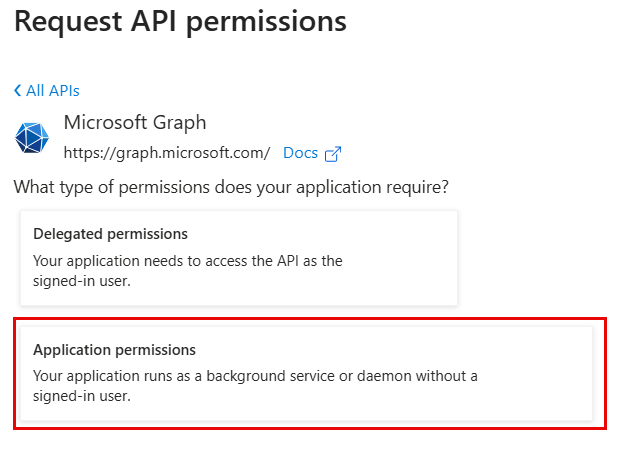
Under Microsoft APIs, click Microsoft Graph.

Select Application permissions.
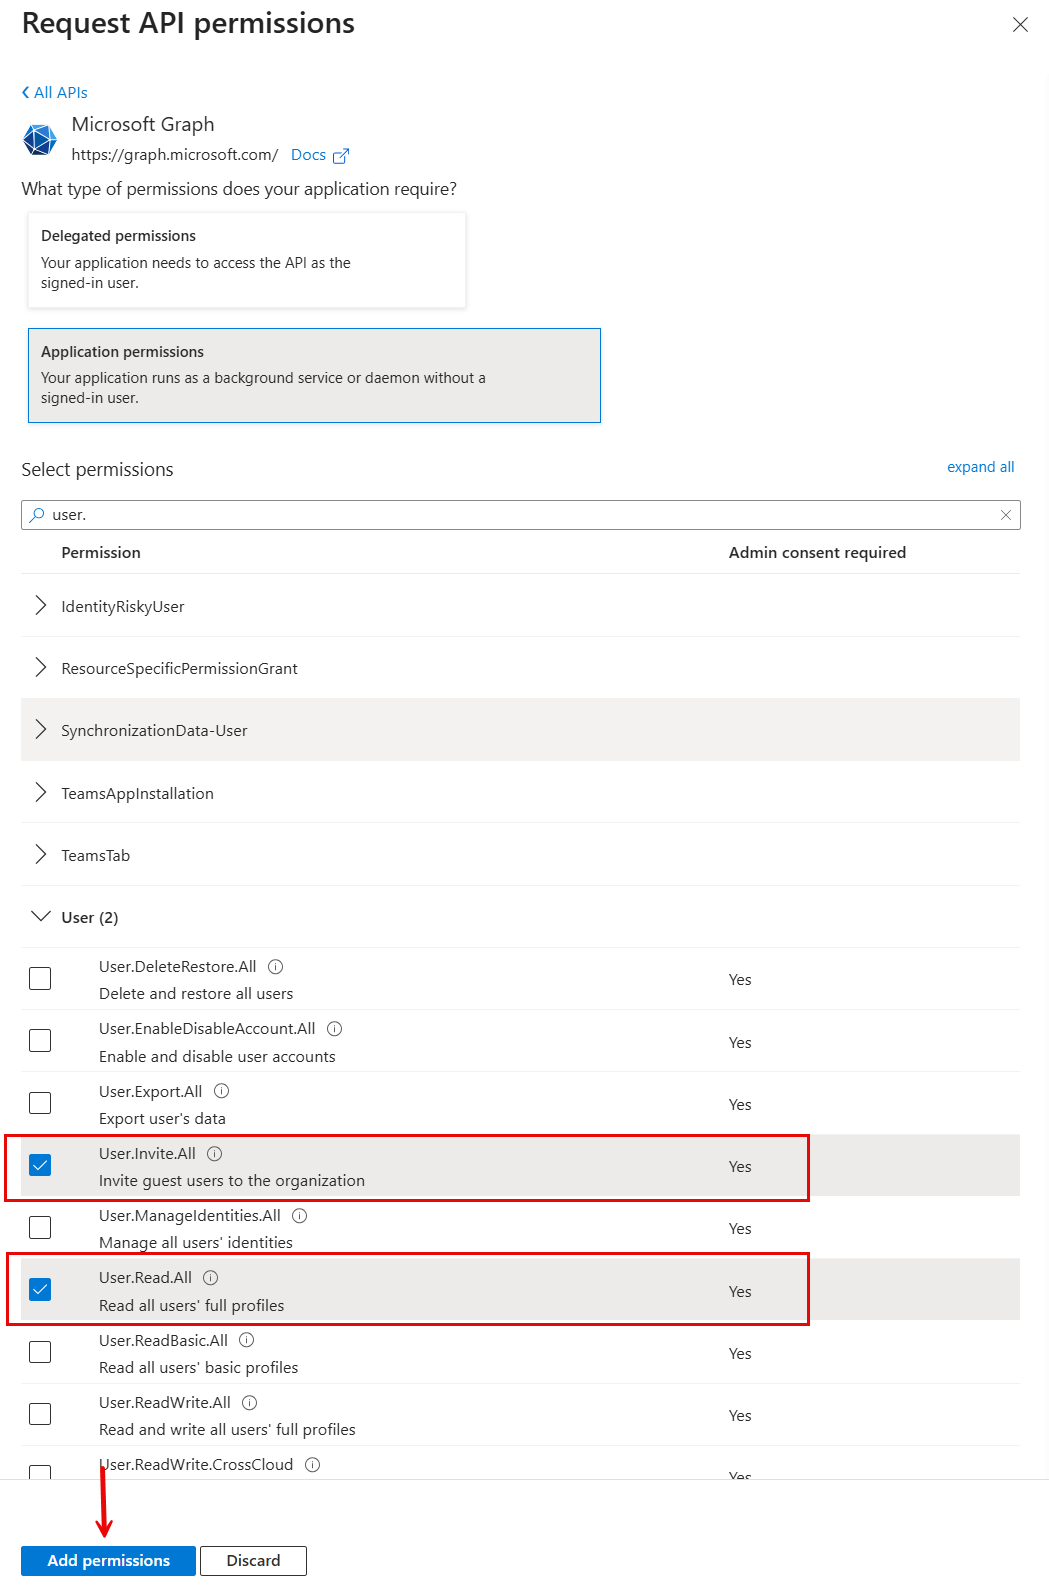
Search and select the following permissions and click Add permissions.
User.Invite.All: Invite guests to the organisationUser.Read.All: Read all users’ profiles for registration
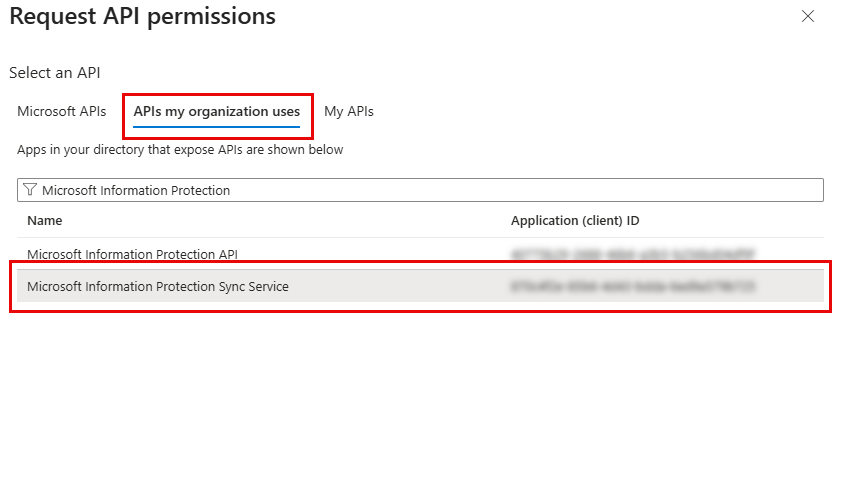
Click Add a permission again and click APIs my organization uses.
Search and select Microsoft Information Protection Sync Service.
APIs my org uses.png Click Application permissions.
Search and select the following permission and click Add permissions.
UnifiedPolicy.Tenant.Read: Read all unified policies of the tenant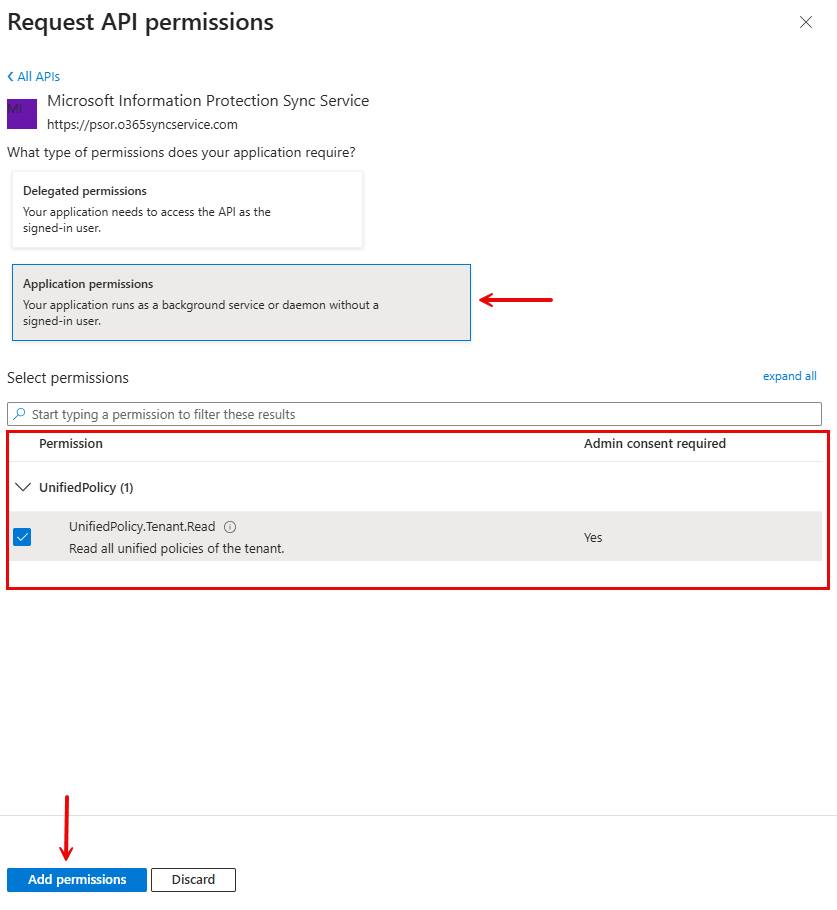
Application permissions.png
Click Add a permission again and under Microsoft APIs, click Azure Rights Management Services.
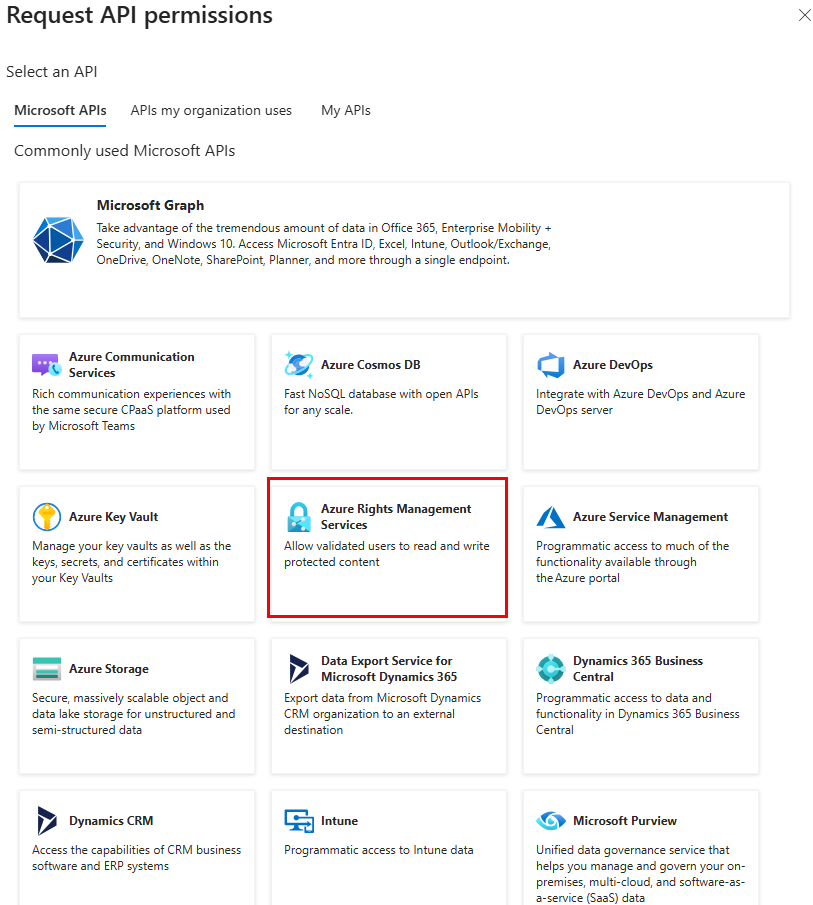
Azure Rights Management Services.png Click Application permissions.
Search and select the following permissions and click Add permissions.
Content.SuperUser: Read all protected content for this tenantContent.Writer: Create protected contentContent.DelegatedWriter: Create protected content on behalf of a user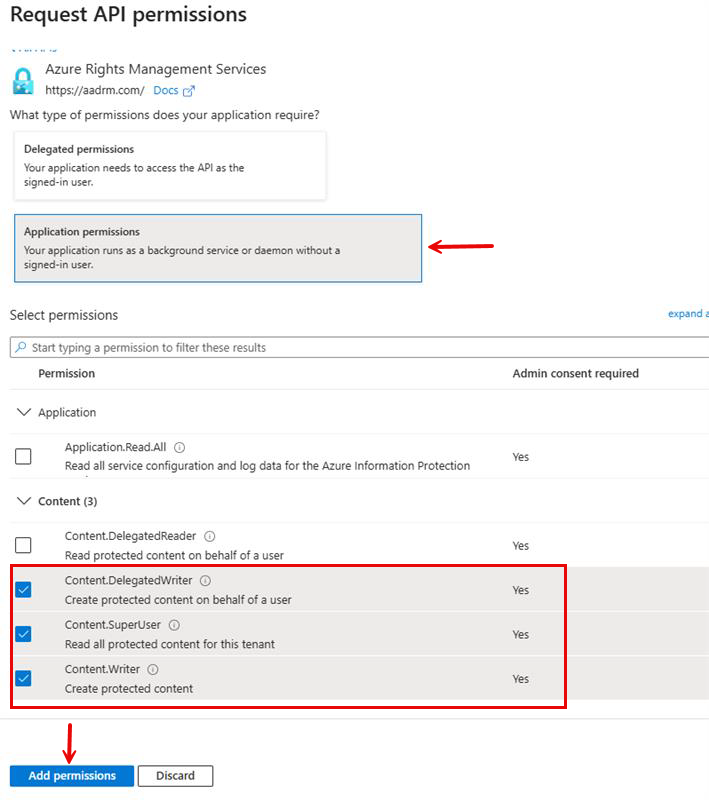
Azure Rights mngm - application permissions.png
After adding these permissions, click Grant admin consent for [Your Organisation] to authorise them for your tenant.
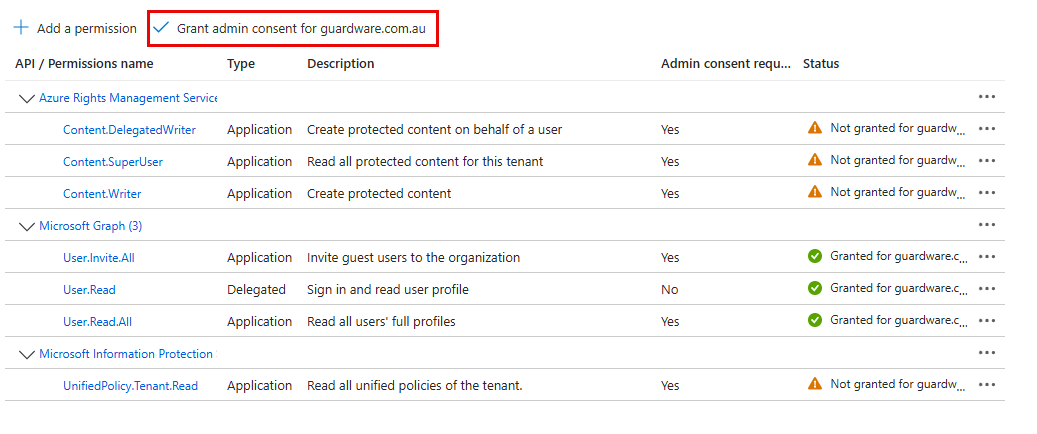
Grant admin consent new.png
3.2. Create a Key Vault
Azure Key Vault is where GuardWare PROTECT securely stores and manages the encryption keys used for data protection. By creating a dedicated Key Vault, you ensure sensitive keys remain under strict access control and are available only to the authorised Service Principal.
Go to the Azure Portal, sign in with your Azure Administrator account, and search for Key vaults and click the first result.
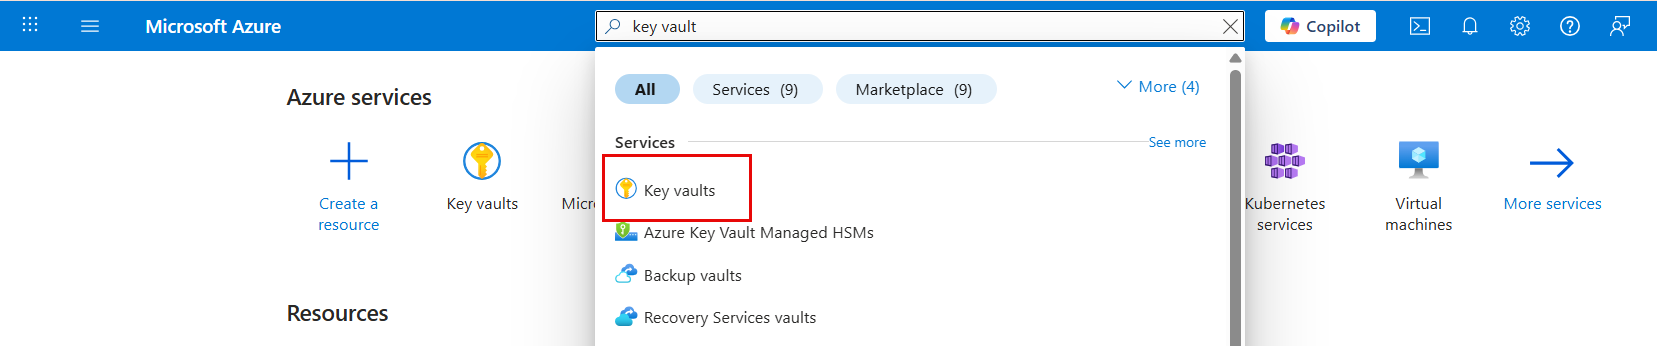
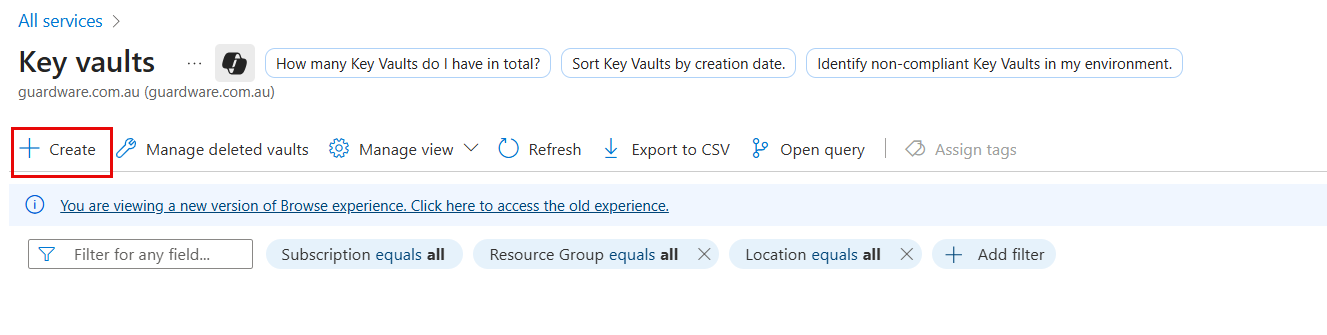
Azure Key vaults.png Click +Create.
In Basics, configure:
Subscription: Select your subscription.
Resource group: Choose existing or create new. Copy and store the Resource group name; you’ll need it to set up PROTECT Server.
Key vault name: Enter a unique name (e.g.,
gwprotect-vault-prod). Copy the name and store it securely. This is the AZURE KEY VAULT NAME that you’ll need to set up PROTECT Server.Region: Select the appropriate region.
Pricing tier: Select your pricing.
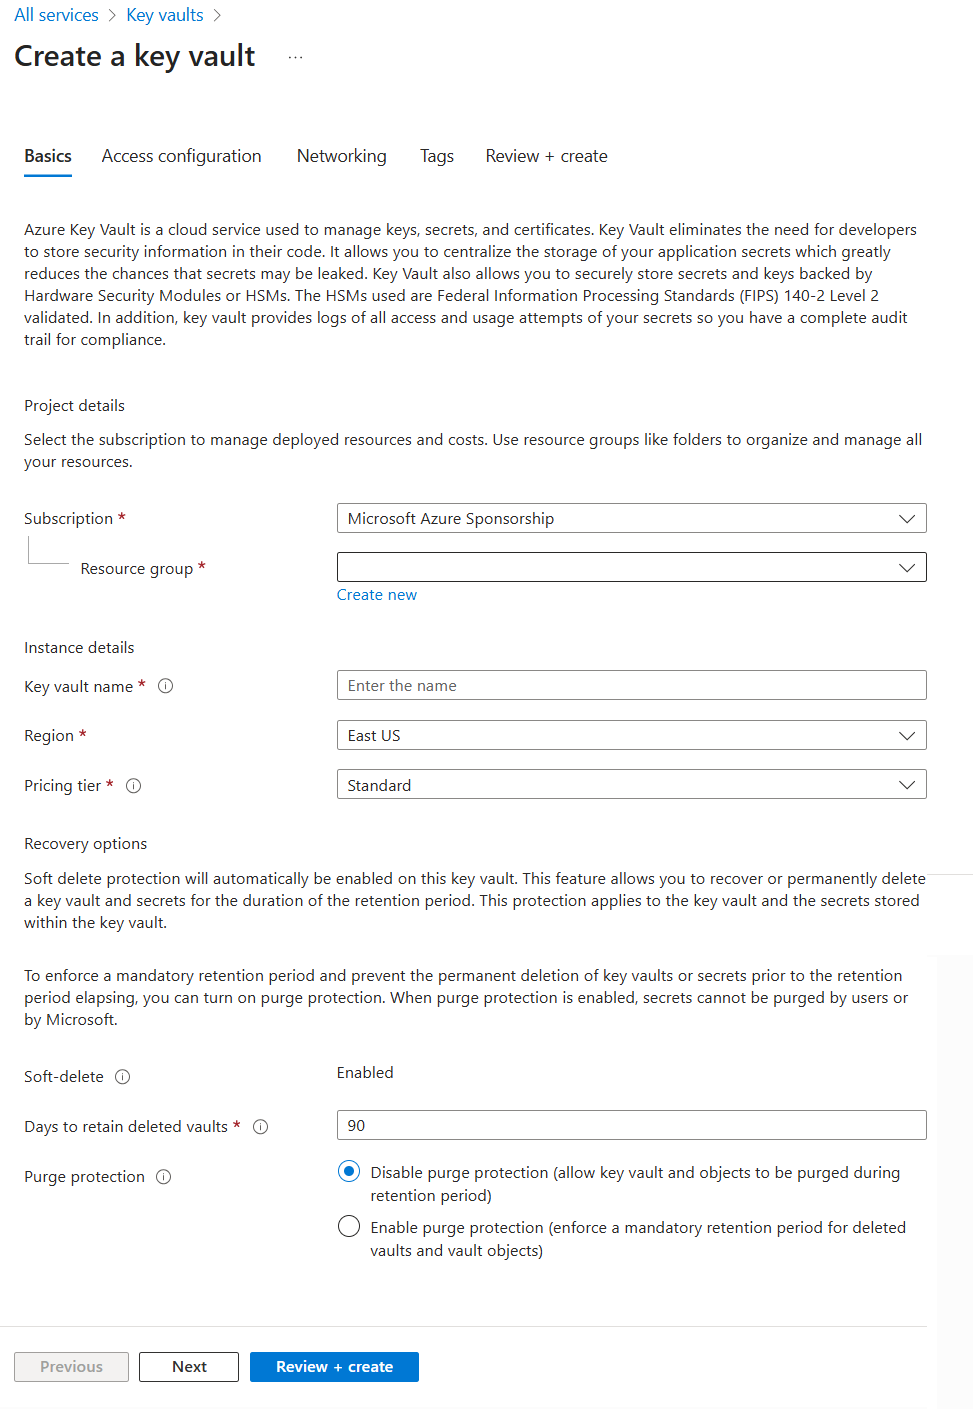
Click Next.
In Access configuration, configure:
Permission model: Select Azure role-based access control.
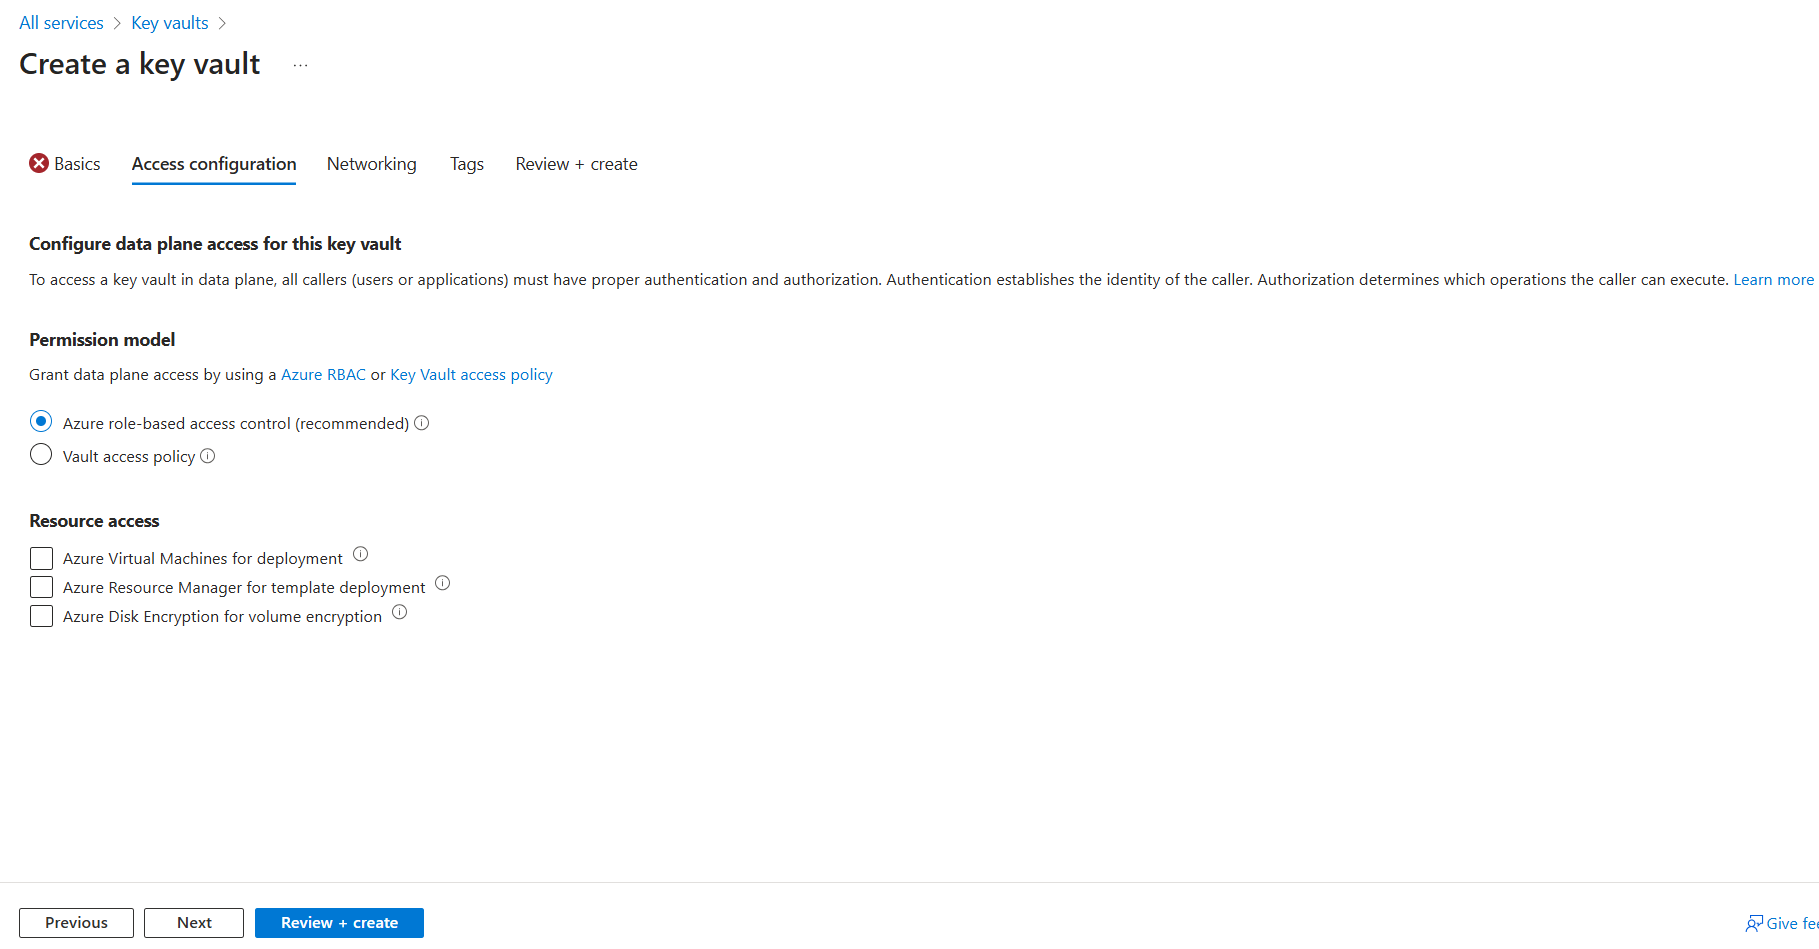
Click Review + Create and then click Create. The Create button may appear disabled for a few moments while Azure validates your configuration.
After creating the Key vault, go to the Key vaults Overview page, and copy the Subscription ID and store it securely. This is the AZURE SUBSCRIPTION ID that you’ll need to set up PROTECT Server.
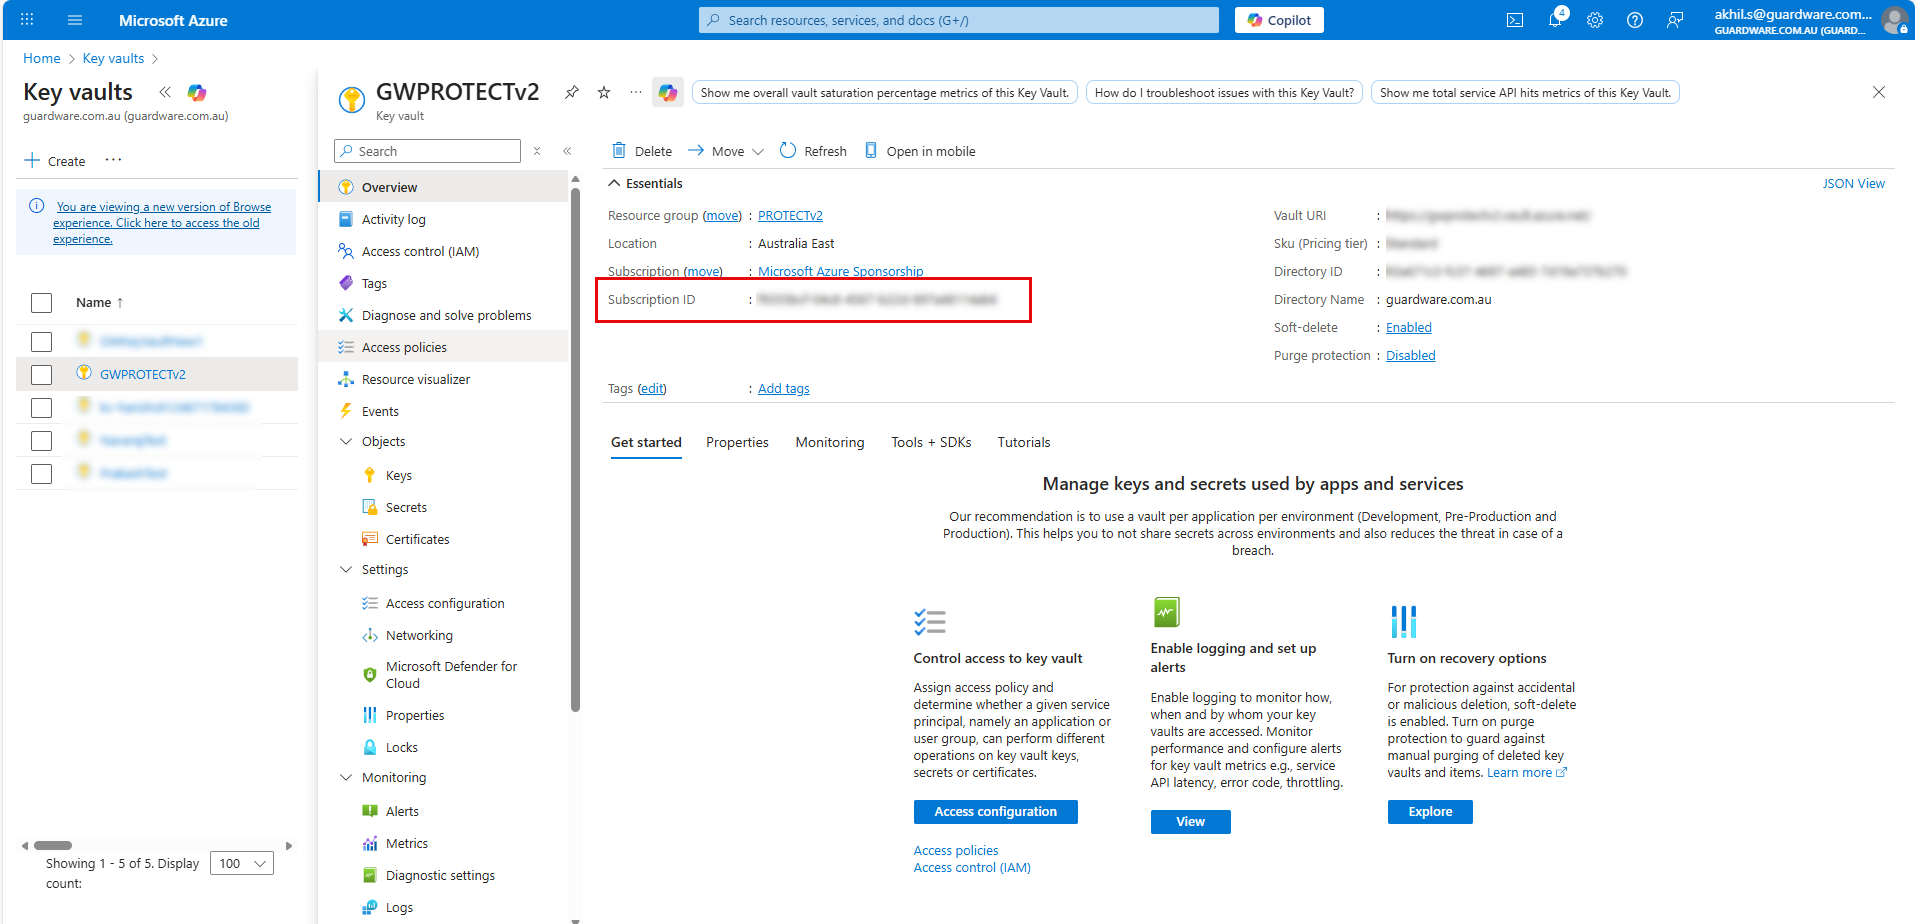
Azure subscription ID.png
3.3. Assign RBAC Roles to Service Principal
After creating the Service Principal, you must assign the required Role-Based Access Control (RBAC) roles, so GuardWare PROTECT can securely access the Key Vault, manage key operations, and control resource-level permissions when needed. These roles ensure the Service Principal has the minimum permissions necessary to perform encryption, decryption, and access management tasks without exposing broader access.
3.3.1. Assign the Key Vault Administrator role
This role is required so the Service Principal can fully manage the Key Vault, including creating, updating, deleting, and recovering keys, secrets, and certificates.
Navigate to the Key Vault that you created and click Access control (IAM).
Click Add and then Add role assignment.
Search and select the Key Vault Administrator role and click Next.
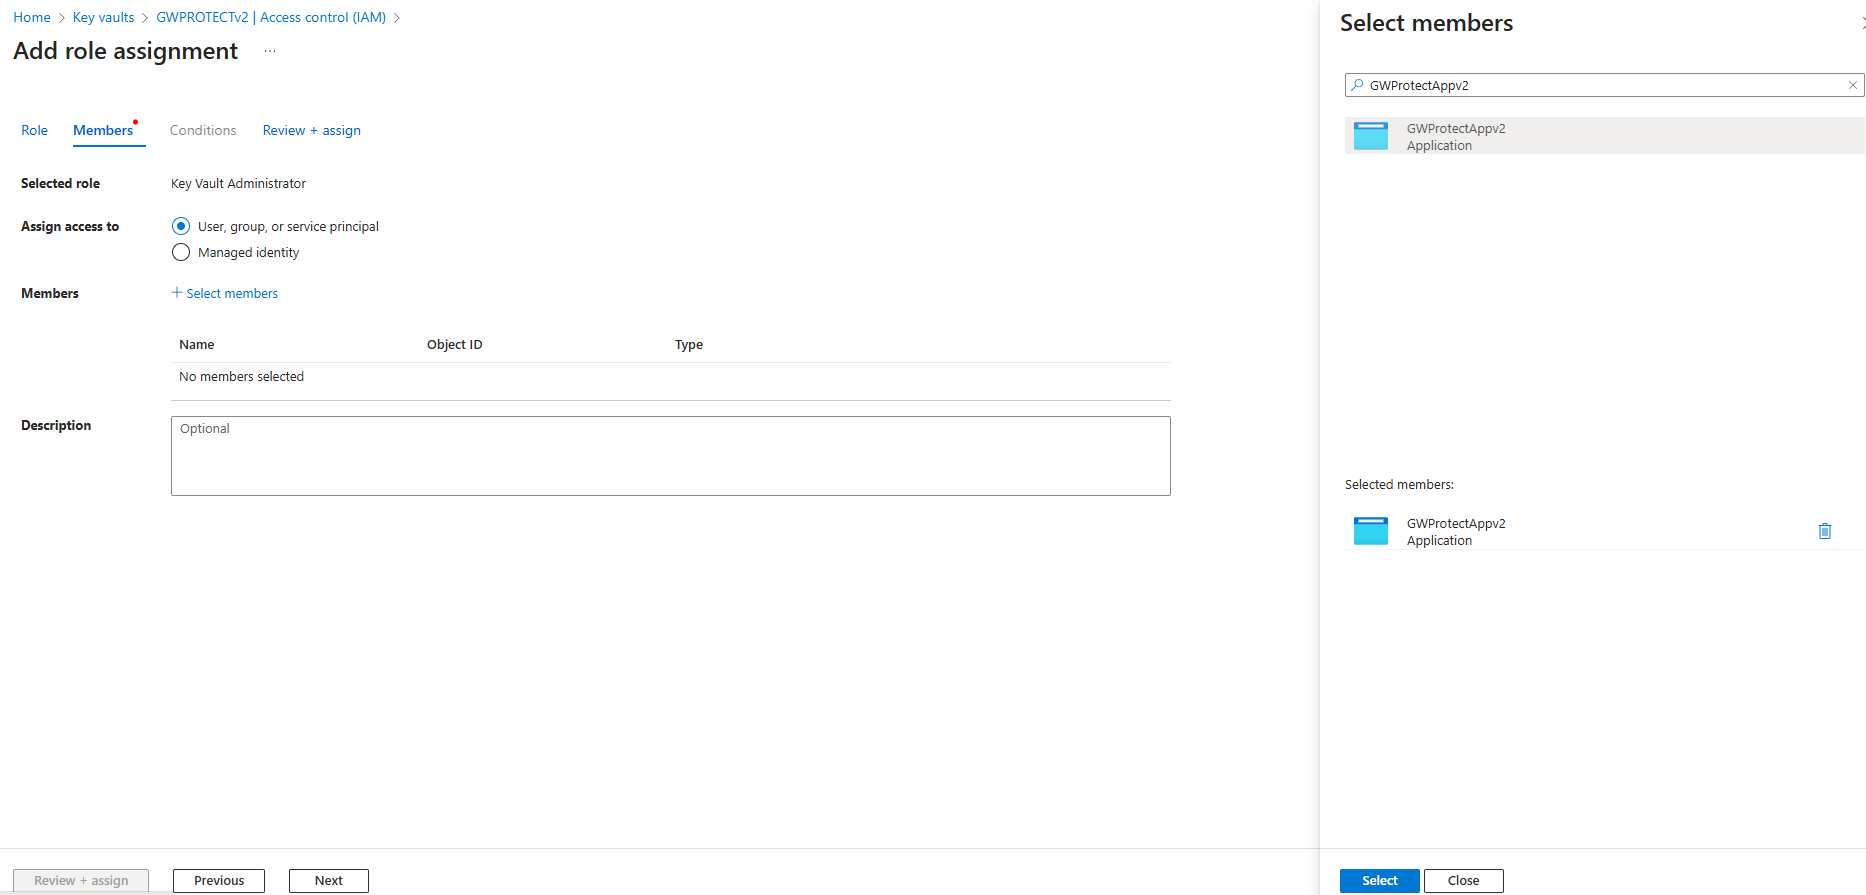
In Assign access to, select User, group, or service principal.
Click + Select members, search and select your registered application (
eg, GWProtectApp).Click Next and then Review + assign.
Assign RBAC Roles.png
3.3.2. Assign the User Access Administrator role
This role is required so the Service Principal can manage access permissions on the resource. With this role, it can grant, modify, or revoke user and service access when needed, ensuring the correct identities have the appropriate permissions.
Navigate to the Key Vault that you created and click Access control (IAM).
Click Add and then Add role assignment.
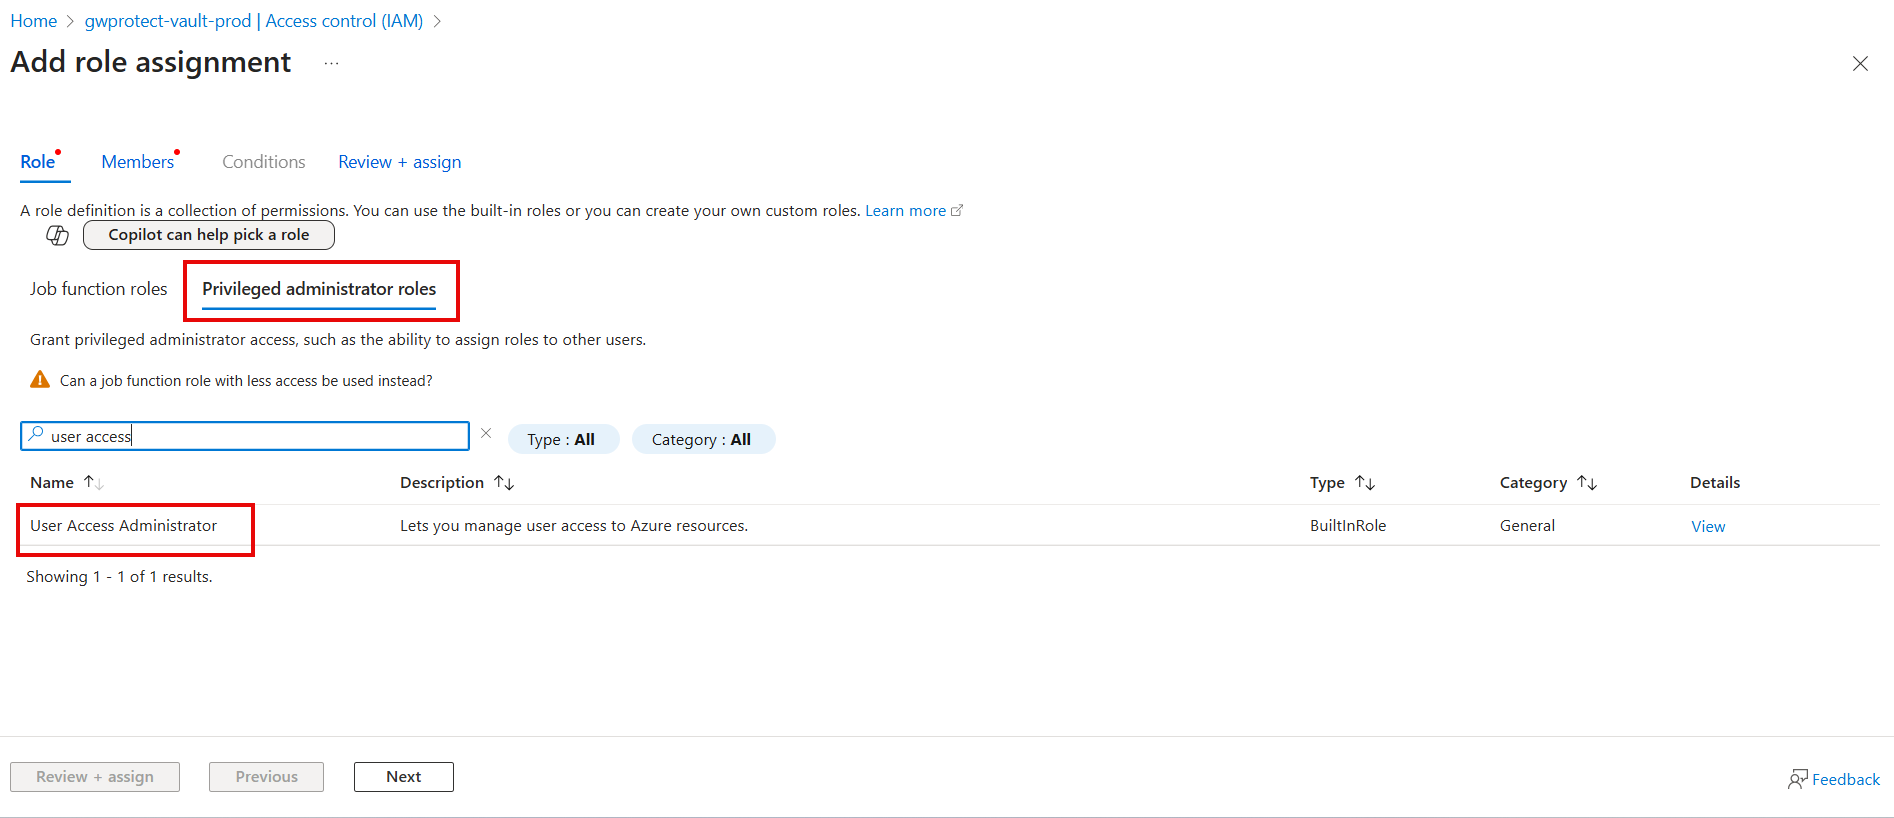
Click Privileged administrator roles.
Search and select the User Access Administrator role and click Next.
Assign User Access Administrator.png In Assign access to, select User, group, or service principal.
Click + Select members, search and select your registered application (
eg, GWProtectApp).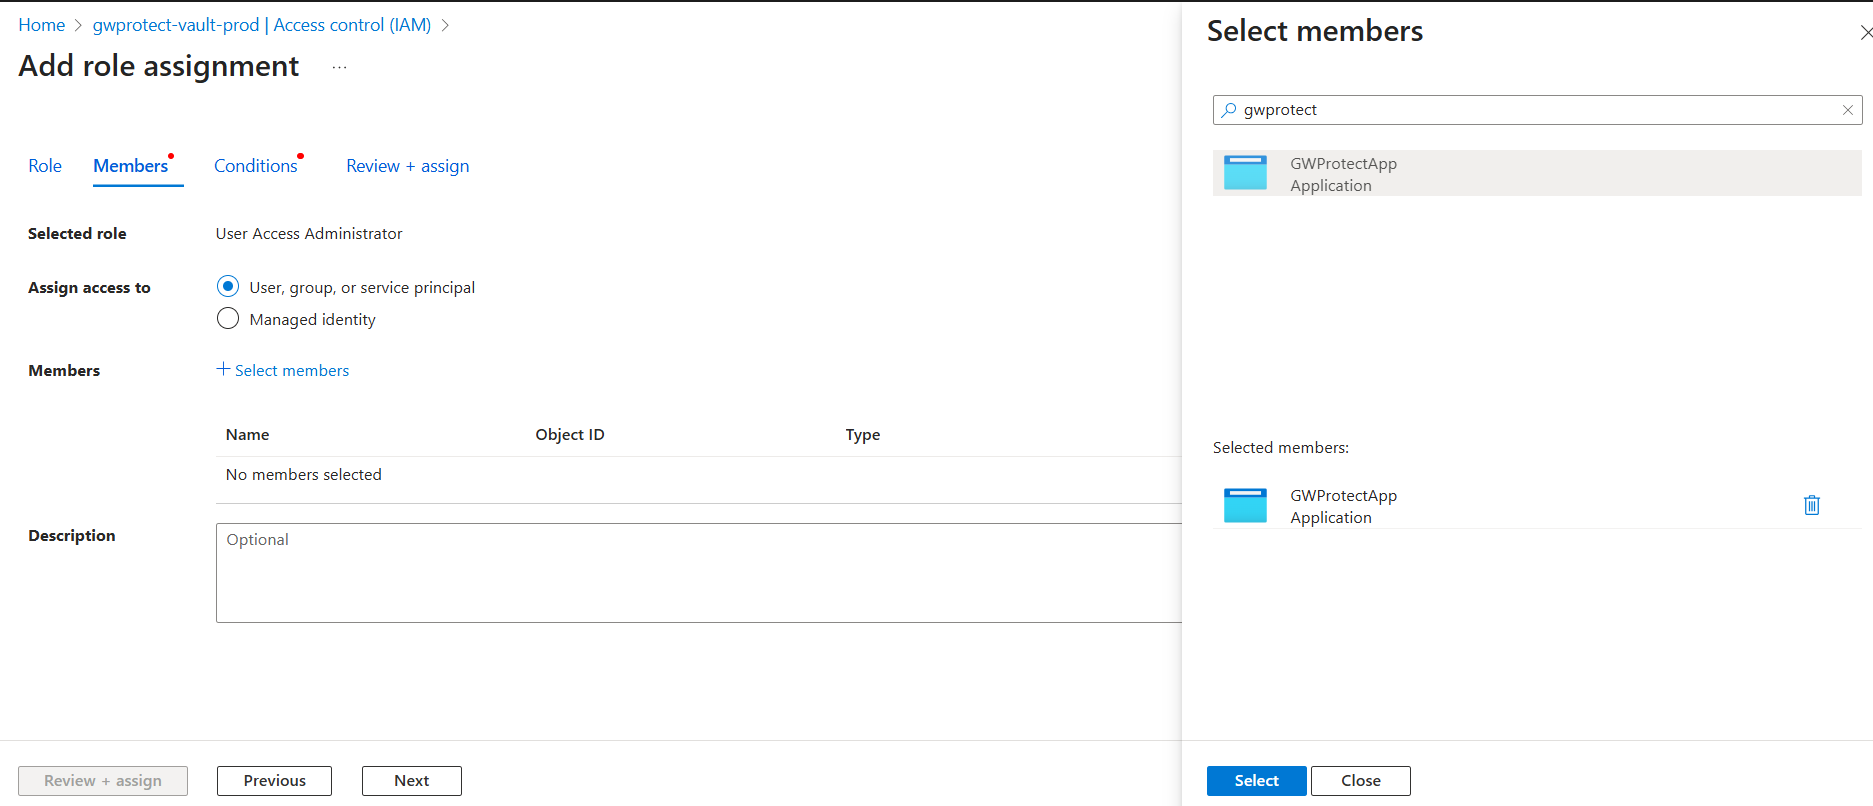
User Access Administrator - Select members.png Click Next.
In What user can do, select the second option: Allow user to assign all roles except privileged administrator roles Owner, UAA, RBAC (Recommended) and click Next.
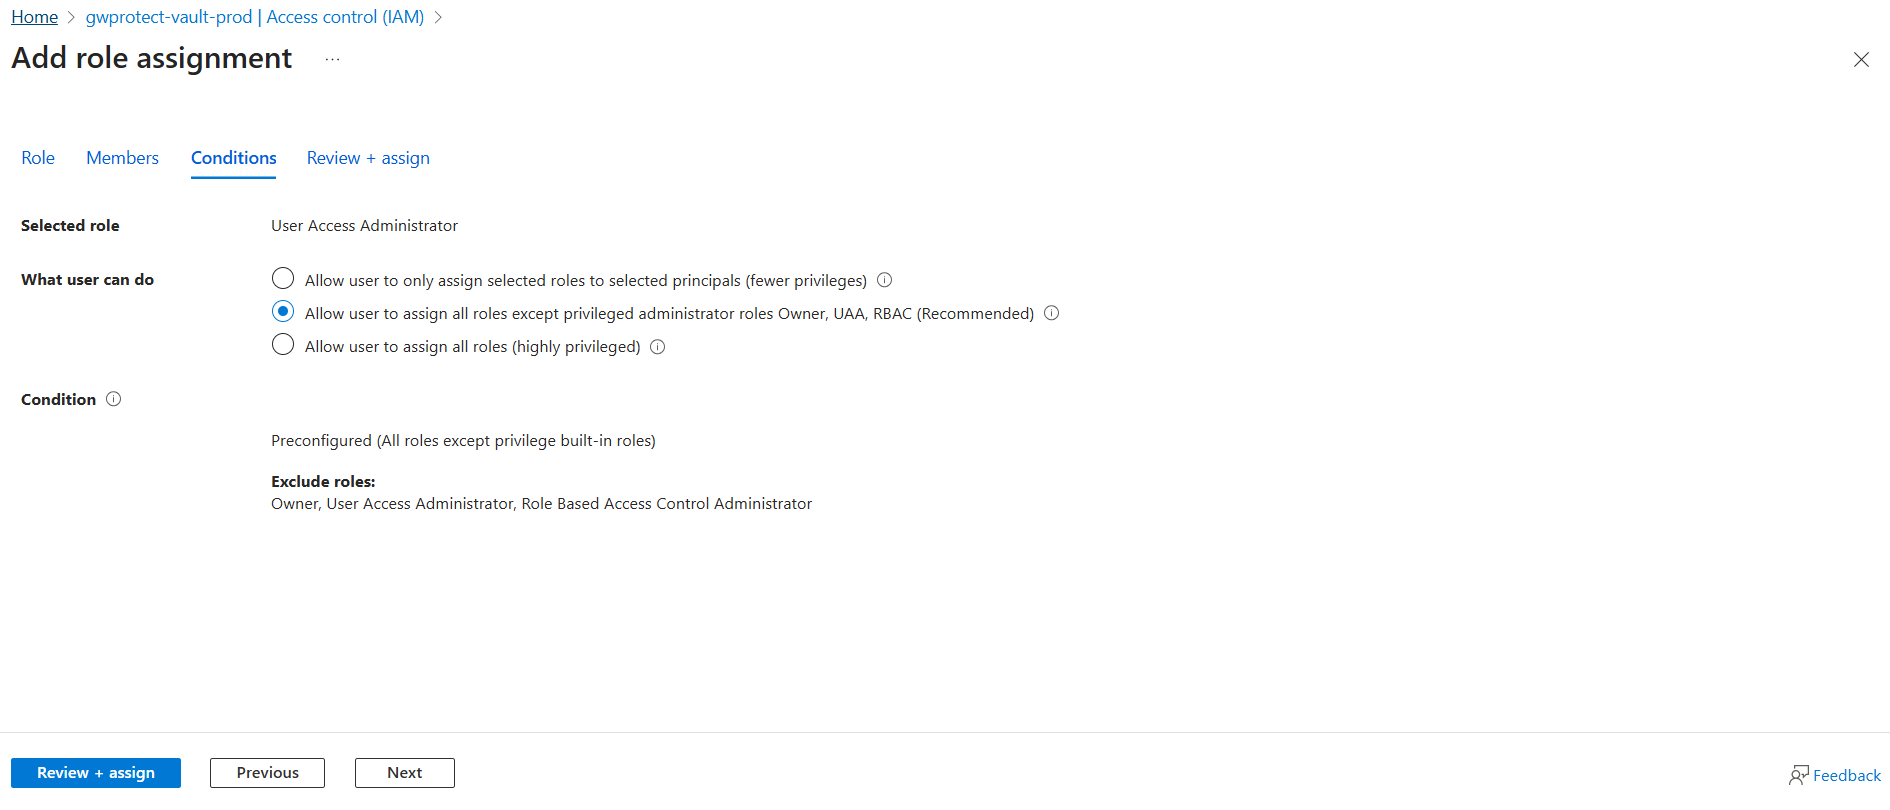
User Access Administrator - What user can do.png Click Review + assign.
3.3.3. Assign the Role-Based Access Control Administrator
This role is required so the Service Principal can not only access the Key Vault, but also update or manage key-related permissions within the resource when necessary.
Navigate to the Key Vault that you created and click Access control (IAM).
Click Add and then Add role assignment.
Click Privileged administrator roles.
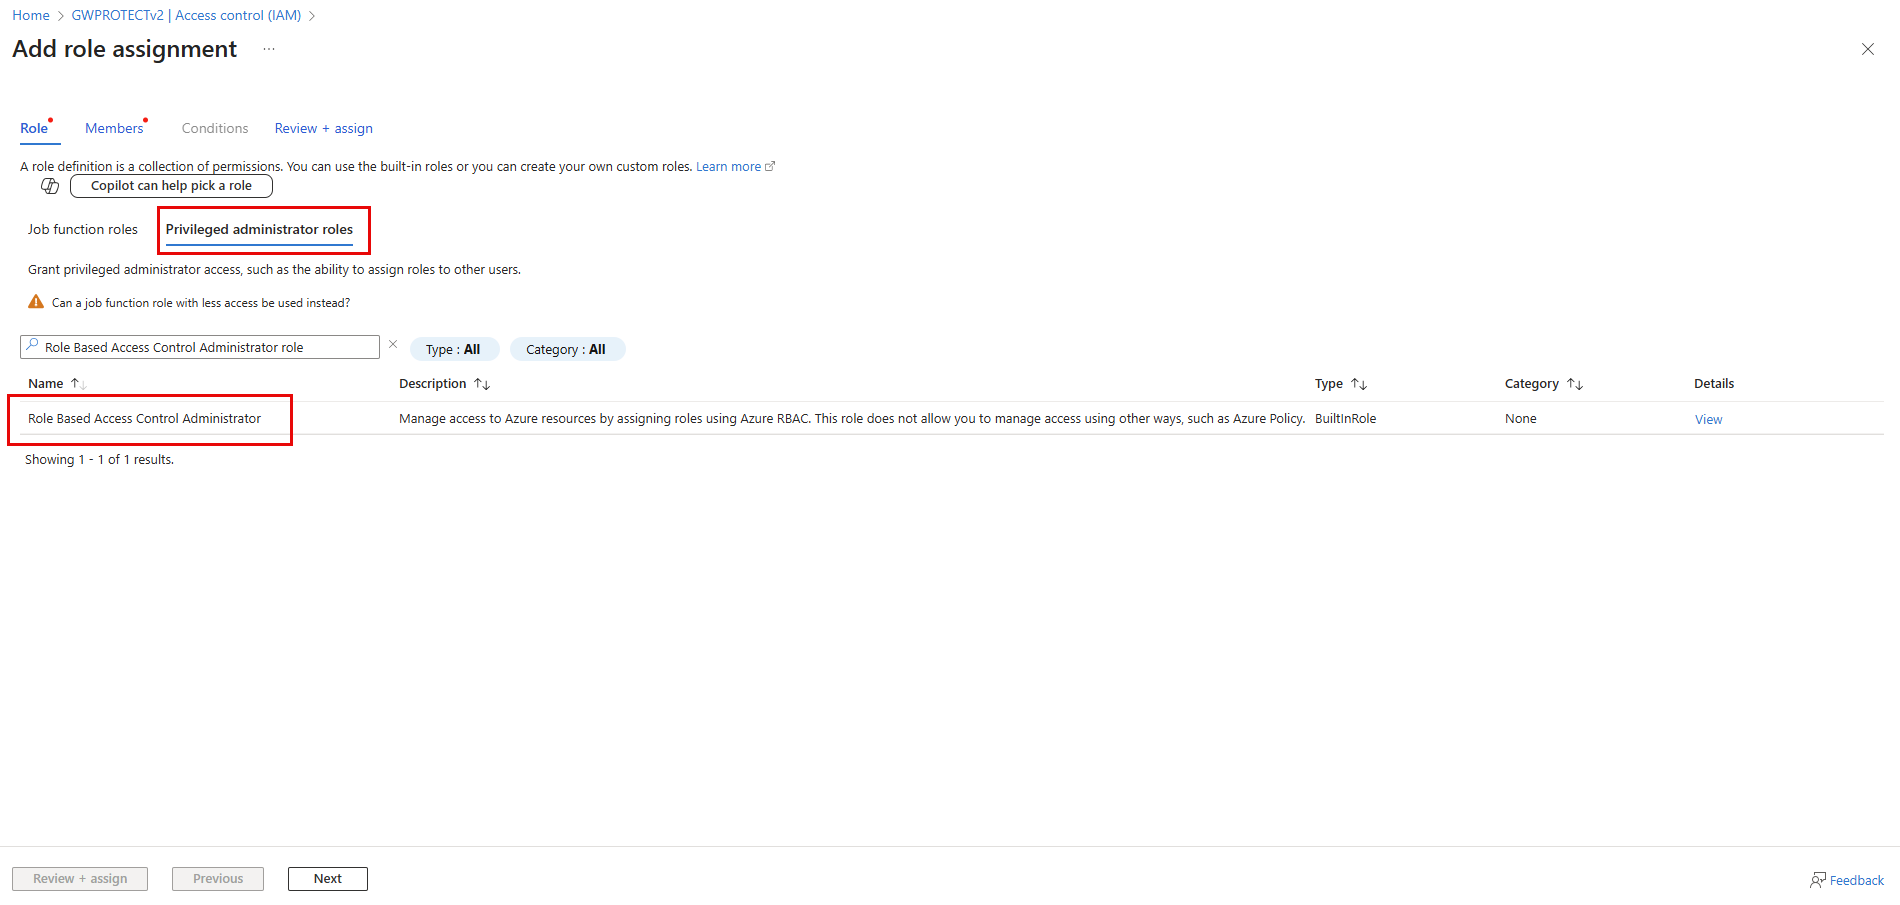
Assign additional RBAC role.png Search and select the Role Based Access Control Administrator role and click Next.
In Assign access to, select User, group, or service principal.
Click + Select members, search and select your registered application (
eg, GWProtectApp).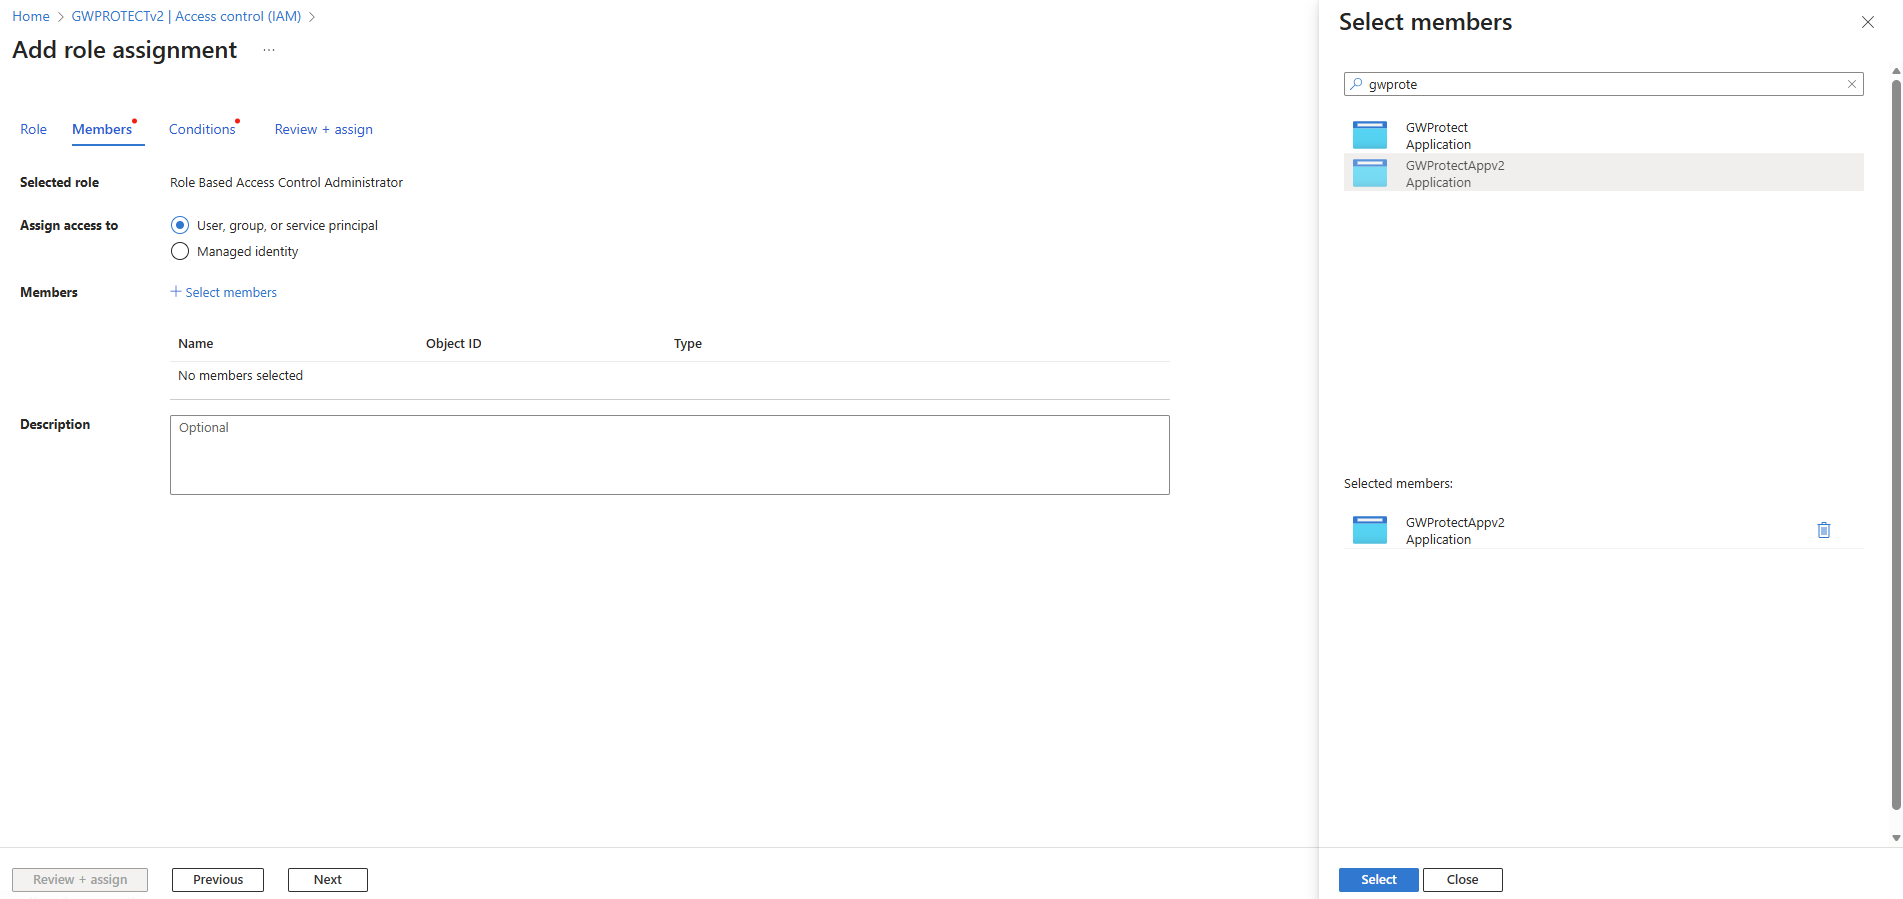
Assign additional RBAC role step 2.png Click Next.
In What user can do, select the second option: Allow user to assign all roles except privileged administrator roles Owner, UAA, RBAC (Recommended) and click Next.
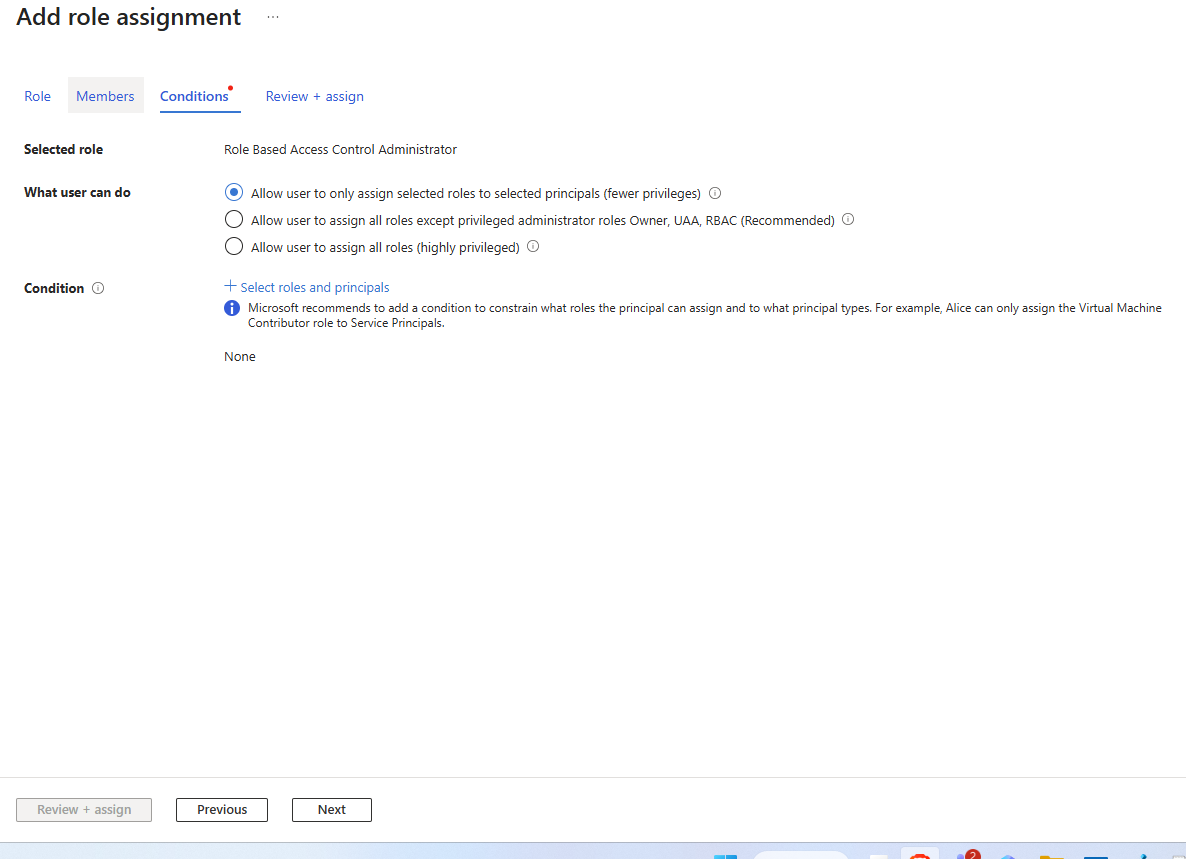
RBAC role -condition.png Click Review + assign.
4. Install the PROTECT Server
The GuardWare PROTECT Server Setup prepares the runtime environment for PROTECT by installing supporting services and dependencies.
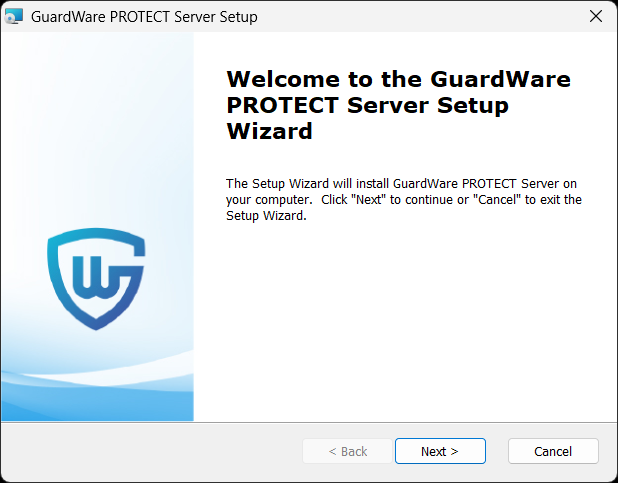
Double-click the PROTECT Server installer file to begin the installation, and click Next.
GuardWare PROTECT Setup Wizard.png Read and accept the End User Licence Agreement (EULA) and click Next.

EULA.png Choose the folder where you want to install GuardWare PROTECT Server and click Next. By default, it will be installed in:
C:\Program Files (x86)\.
installation_folder.png Select the location where you want to install IIS, and click Next.

IIS installation location.png On the Database Connection Setting page, fill in the required fields and click Next.
Enter the same DB Host, DB Port, DB Username, and DB Password that you used during the MySQL installation.
DB Host: localhost
DB Port: 3306 (default)
DB Name:
If you want to create a new database, enter a unique name and select Fresh Installation.
If you have already created a database, enter the existing database name, and select Database Exists to connect PROTECT to an existing MySQL database. This option is usually selected during upgrades or when combining reports in a single database; however, it may modify or remove existing data, so make a backup of the database beforehand.
DB Username: root (default)
DB Password: Enter the password that you used while installing MySQL.
Click Test Connection to check whether the entered information is valid or not. After the successful connection, click OK in the confirmation box and click Next.

Configure database connection.png
Database hostnames in MySQL are not case-sensitive. For example, localhost, LocalHost, and LOCALHOST will all connect to the same server.
Database names on Windows are also not case-sensitive, so variations in letter case (e.g., PROTECT vs. protect) will still point to the same database. However, MySQL usernames and passwords are always case-sensitive, so ensure that you enter them exactly as configured.
In the Super Admin Credential window, enter the Super Admin’s name, email, password, confirm password, and click Next. The Super Admin will be required to change this password upon first sign-in.
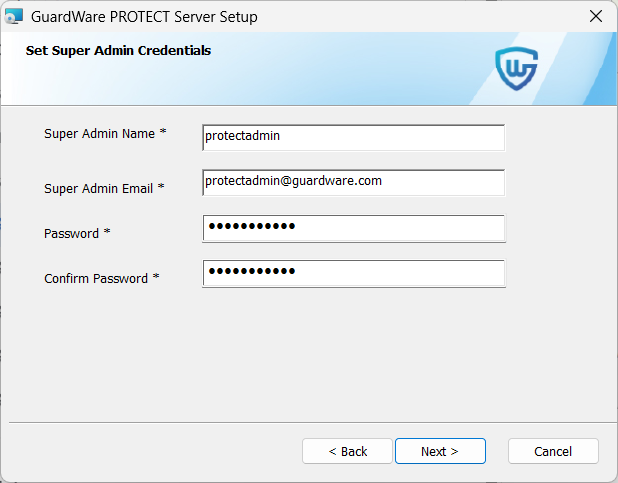
Superadmin credentials.png
These Super Admin credentials are required to log in to the GuardWare PROTECT Management Console, so store them securely.
In Protocol, select https.
Enter the domain name that you would like the IIS to access. You can have the following domain name formats:
When selecting https protocol, you must select an SSL Certificate. This certificate may be self-signed or issued by a Certificate Authority. If you select a self-signed certificate, you must bind it to IIS for encrypted communication. For details on creating a self-signed certificate, see Create a Self-Signed Certificate. For details on binding a self-signed certificate, see Create an SSL Binding.
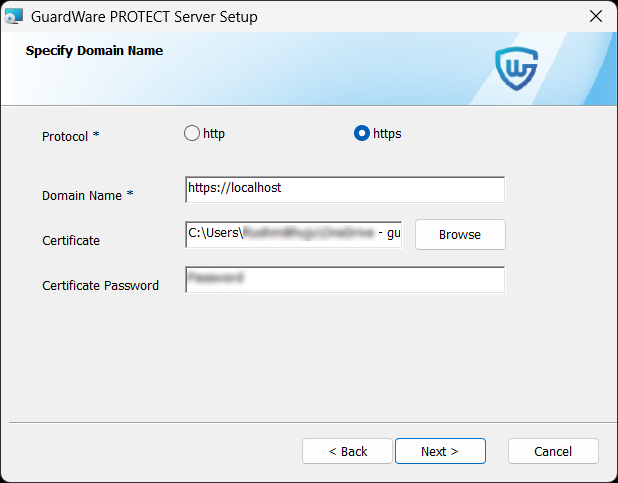
PROTECT - upload certificate.png If the certificate file (e.g.,
.pfx) is password-protected, enter the same password in Certificate Password and click Next.Follow the steps provided in Set up Azure Key Vault to configure AKV Handler.
In AKV Handler, enter the following details you noted while setting up Azure Key Vault.
AZURE TENANT ID= "your-tenant-id"
AZURE CLIENT ID= "your-client-id"
AZURE CLIENT SECRET= "your-client-secret"
AZURE SUBSCRIPTION ID= "your-subscription-id"
AZURE KEY VAULT NAME= "your-key-vault-name"
API HOST= localhost
API PORT= 8000 To check if port 8000 is already in use:
Open Command Prompt.
Run the following command:
This command helps identify if another process is already using port 8000. If the port is occupied, you may need to stop the conflicting service or choose a different available port.

After entering all details, click Next.
Click Install to start the installation process. This may take a few minutes.

Once the setup is complete, the GuardWare PROTECT Management Console should launch automatically at https://localhost/gwapp/login. If you encounter an error at this stage, it is likely due to the missing IIS URL Rewrite Module. This module is required to correctly process incoming web requests and route them to the appropriate application paths. Installing the module will resolve the error and allow the console to load as expected. See Install the IIS URL Rewrite Module for details on installing it.
5. Post-Installation Requirement
Once the PROTECT Server setup is successfully completed, you must install the IIS URL Rewrite Module. The IIS URL Rewrite Module is an add-on for Internet Information Services (IIS) that allows you to create rules for manipulating URLs, such as rewriting requests internally, redirecting traffic, enforcing HTTPS or canonical domains, and mapping clean, user-friendly URLs to backend query strings. The module ensures that all incoming requests are properly routed through index.php, allowing Laravel’s internal router to handle application paths and APIs.
5.1. Install the IIS URL Rewrite Module
Download the installer file for the IIS URL Rewrite Module.
Double-click the IIS URL Rewrite Module installer file to begin the installation.
Read and accept the Licence Agreement terms and click Install.

Click Finish to exit the Setup Wizard.
6. Log in to the GuardWare PROTECT Management Console
After completing the setup, you can access the GuardWare PROTECT Management Console from a web browser at https://localhost/gwapp/login.

Log in using the Super Admin credentials.
On your first login, you will be prompted to set up two-factor authentication (2FA) using an Authenticator app on your mobile device. Open the Authenticator app and scan the QR code displayed on the screen.
Enter the verification code generated by the app.
Read and accept the End User Licence Agreement (EULA).
You will now be prompted to create a new password. Enter and confirm the new password.
Once the password is updated, you’ll again be asked to enter the verification code from the Authenticator app. Enter the code and log in using your newly created password to access the GuardWare PROTECT Management Console.

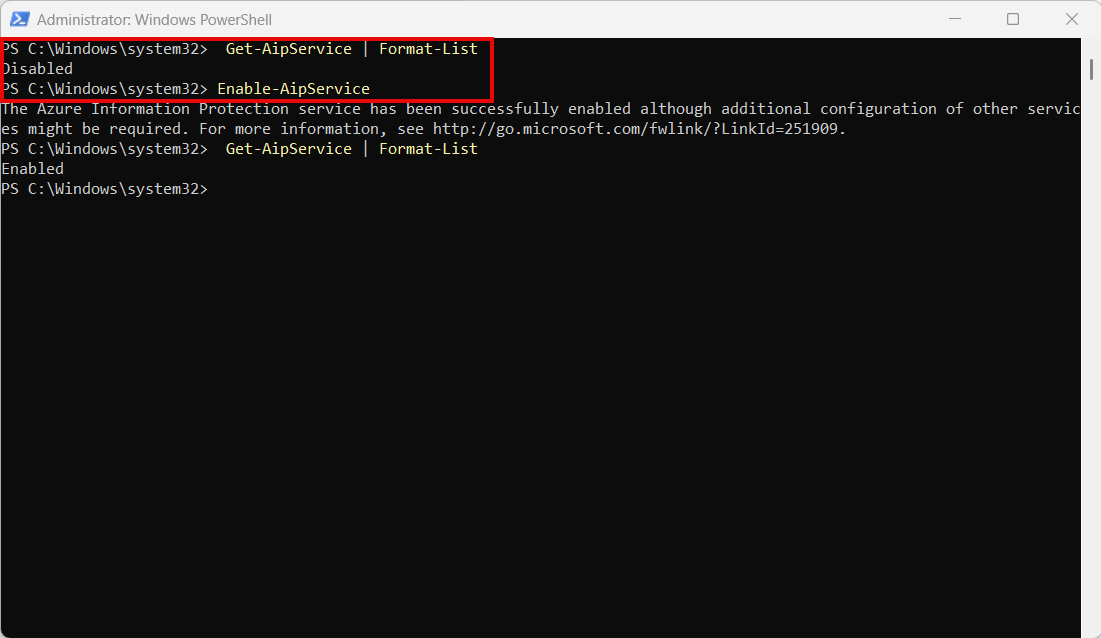
7. Enable the AIP Service for MIP
Before GuardWare PROTECT can use Microsoft Information Protection (MIP) for file sharing, the Azure Information Protection (AIP) service must be active in your tenant. The AIP service manages the encryption and labelling framework used by MIP to protect files. You can enable and verify the AIP service by running a few PowerShell commands with administrative privileges.
To use AIP/MIP labelling, your organisation must have a supported Microsoft Purview licence (such as Microsoft 365 E3/E5, Azure Information Protection P1/P2, or Microsoft Purview Information Protection).
Open PowerShell as an administrator.
Run the following commands in order:
If the service status returns Enabled, MIP is ready for use with PROTECT.
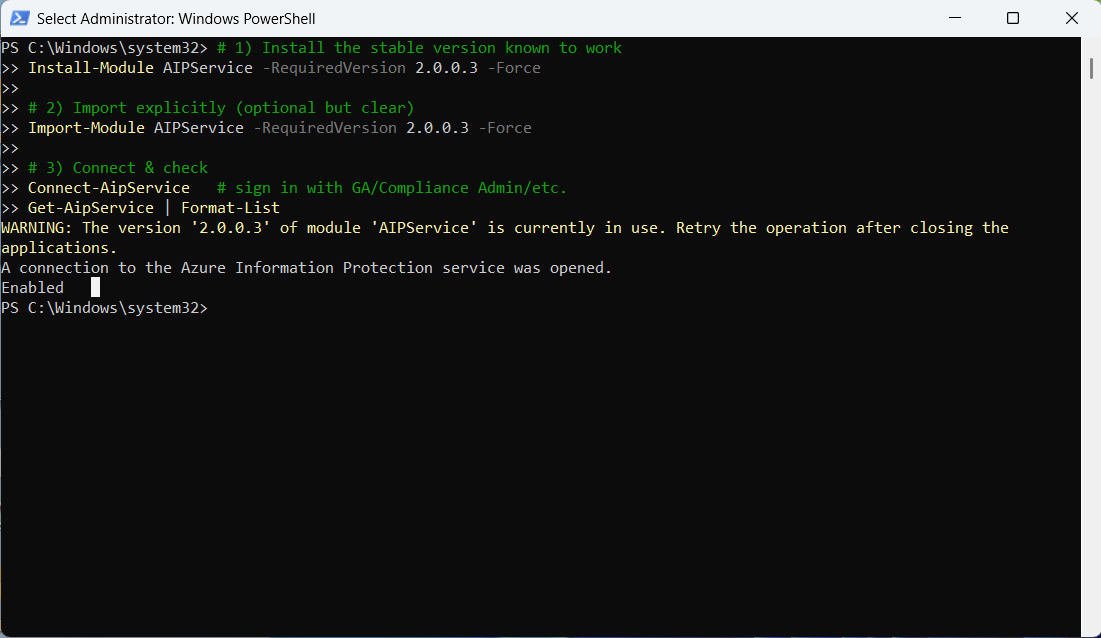
If the service status returns Disabled, run the following command to enable the service:
Your PROTECT Server is now successfully set up. You can start managing security groups, users, user policies, user access, authorised applications and websites through the PROTECT Management Console.
Last updated